Write and Publish a Tutorial!
Do you have good notes or papers written by you and seeking for a
platform to publish? We provide the platform to publish your tutorials
in your name. If you wish to publish your tutorial in your name to
help the readers, Please contact us by sending an email to
publish@tools4testing.com or publish@java4coding.com The main way that
others learn about your work is through your published tutorials. If
you don’t publish, it will be as if you never did the work. Your notes
can help the readers only when you share it.
How to create CloudFormation template
To create CloudFormation template you can use any of the below options:
Use any text editor to develop template from scratch
Create template from AWS Designer, a graphical user interface offered by AWS. You can get option to drag and drop Resource Type to template.
Use built-in template editors provided by the AWS toolkits for Microsoft Visual Studio and Eclipse.
Start with a template from a public library that offers a default implementation and adapt it to your needs.
Use a template provided by your vendor.
What is stack
If you create an infrastructure from a template, CloudFormation calls it a stack. You can think of template versus stack much like class versus object. The template exists only once, whereas many stacks can be created from the same template.
Create stack by uploading a template from AWS console
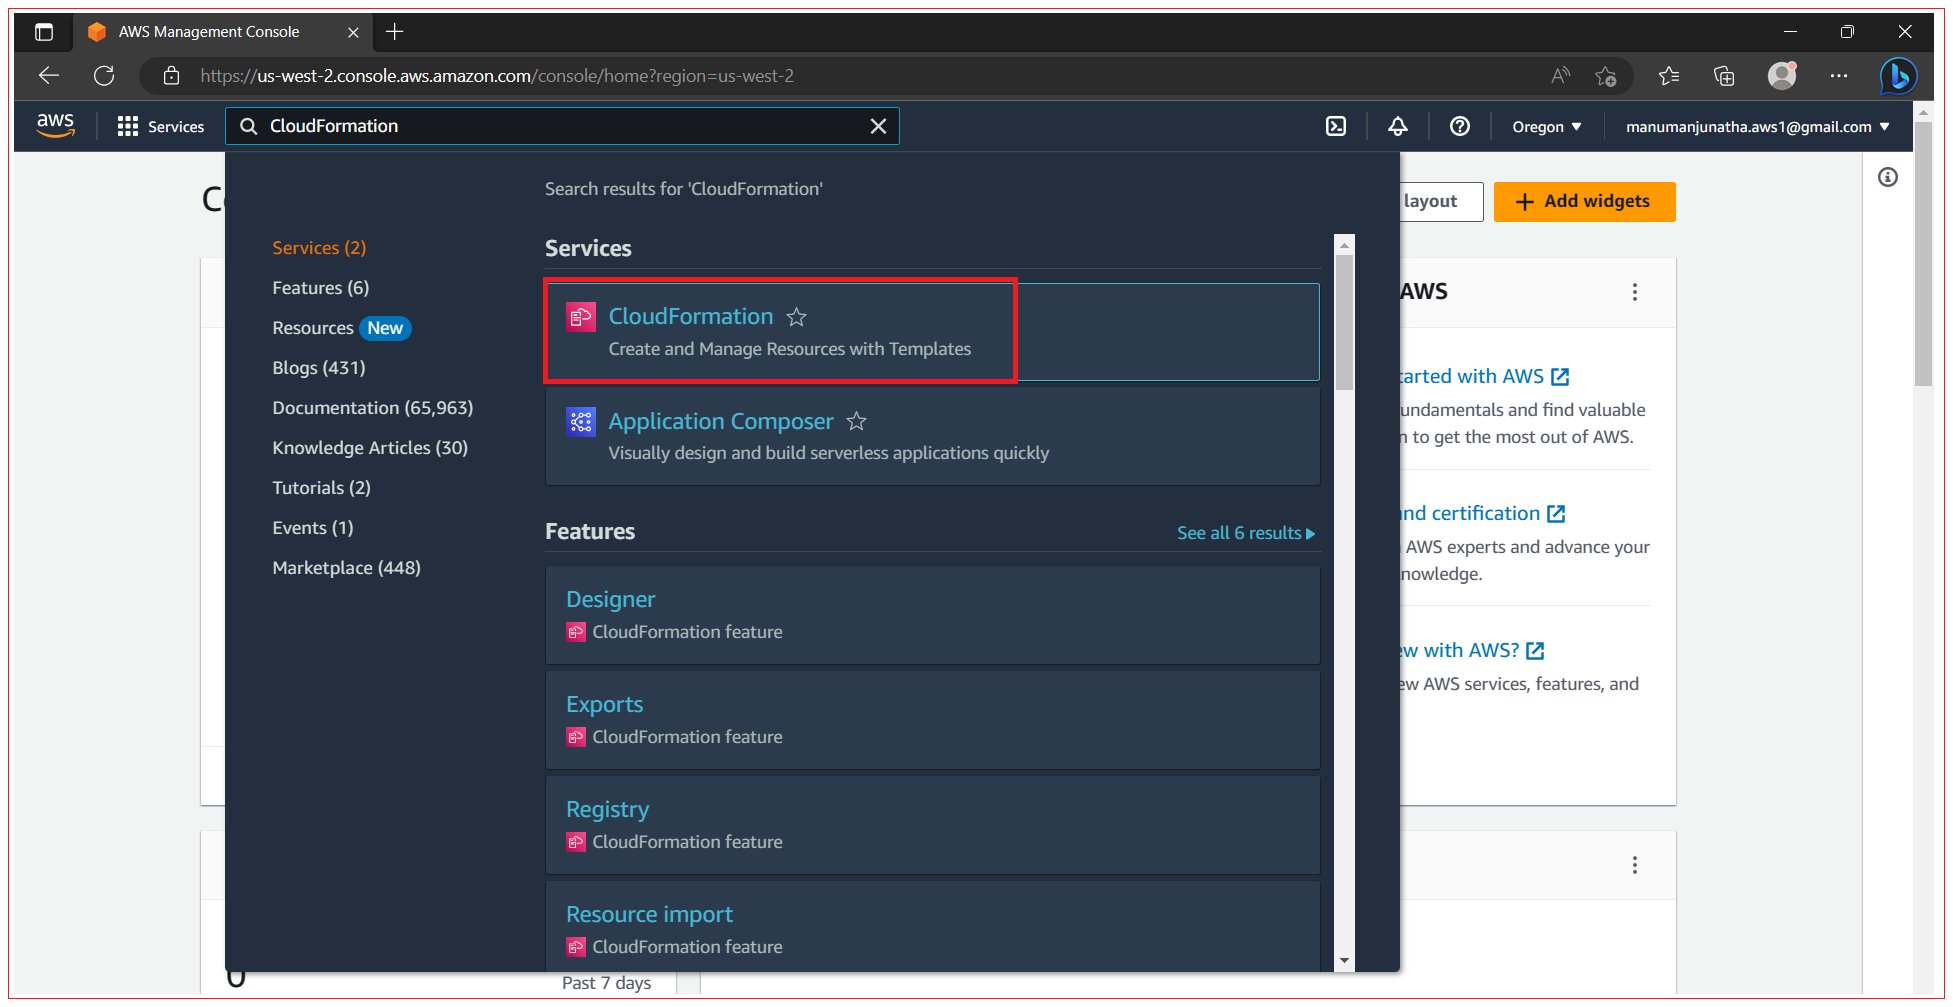
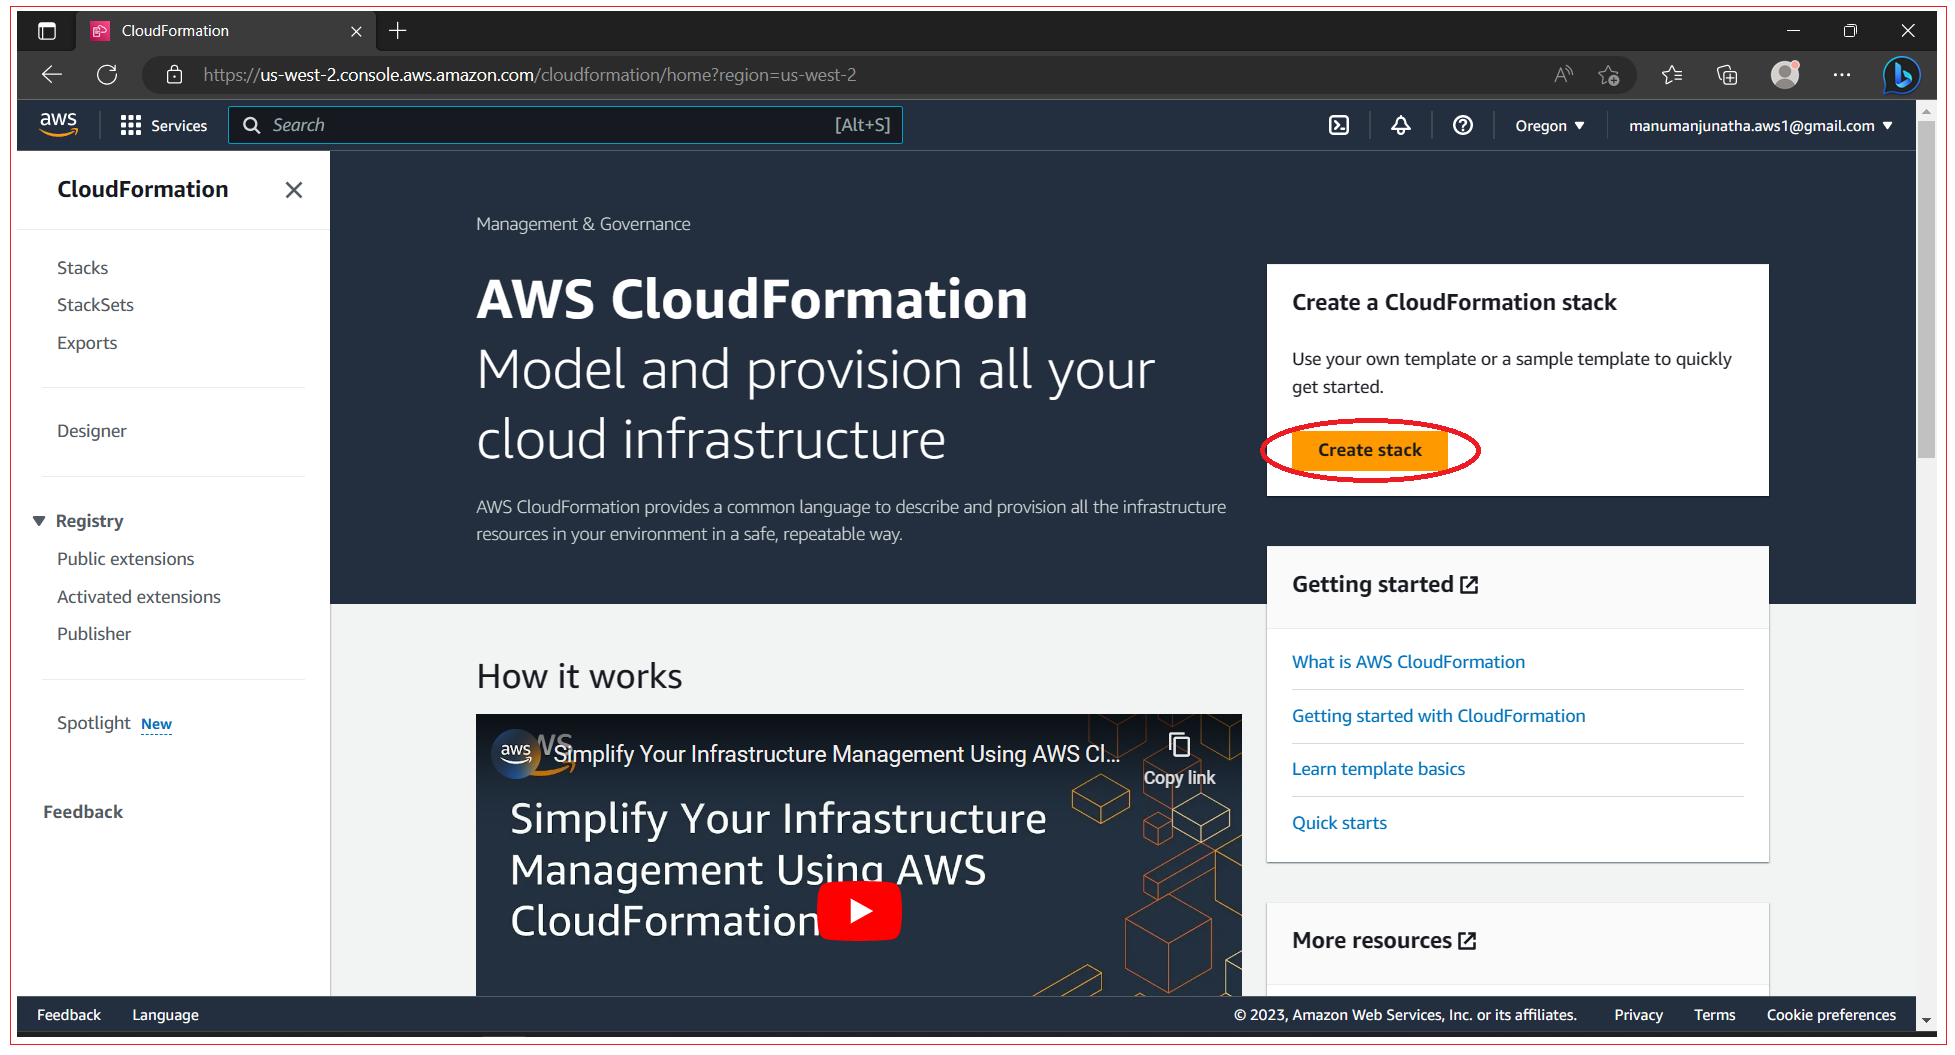
Step 1: Navigate to CloudFormation screen
Open the AWS Management Console, click Services in the navigation bar, and then click the CloudFormation service. When it opens ClodFormation home screen, click on Create stack.
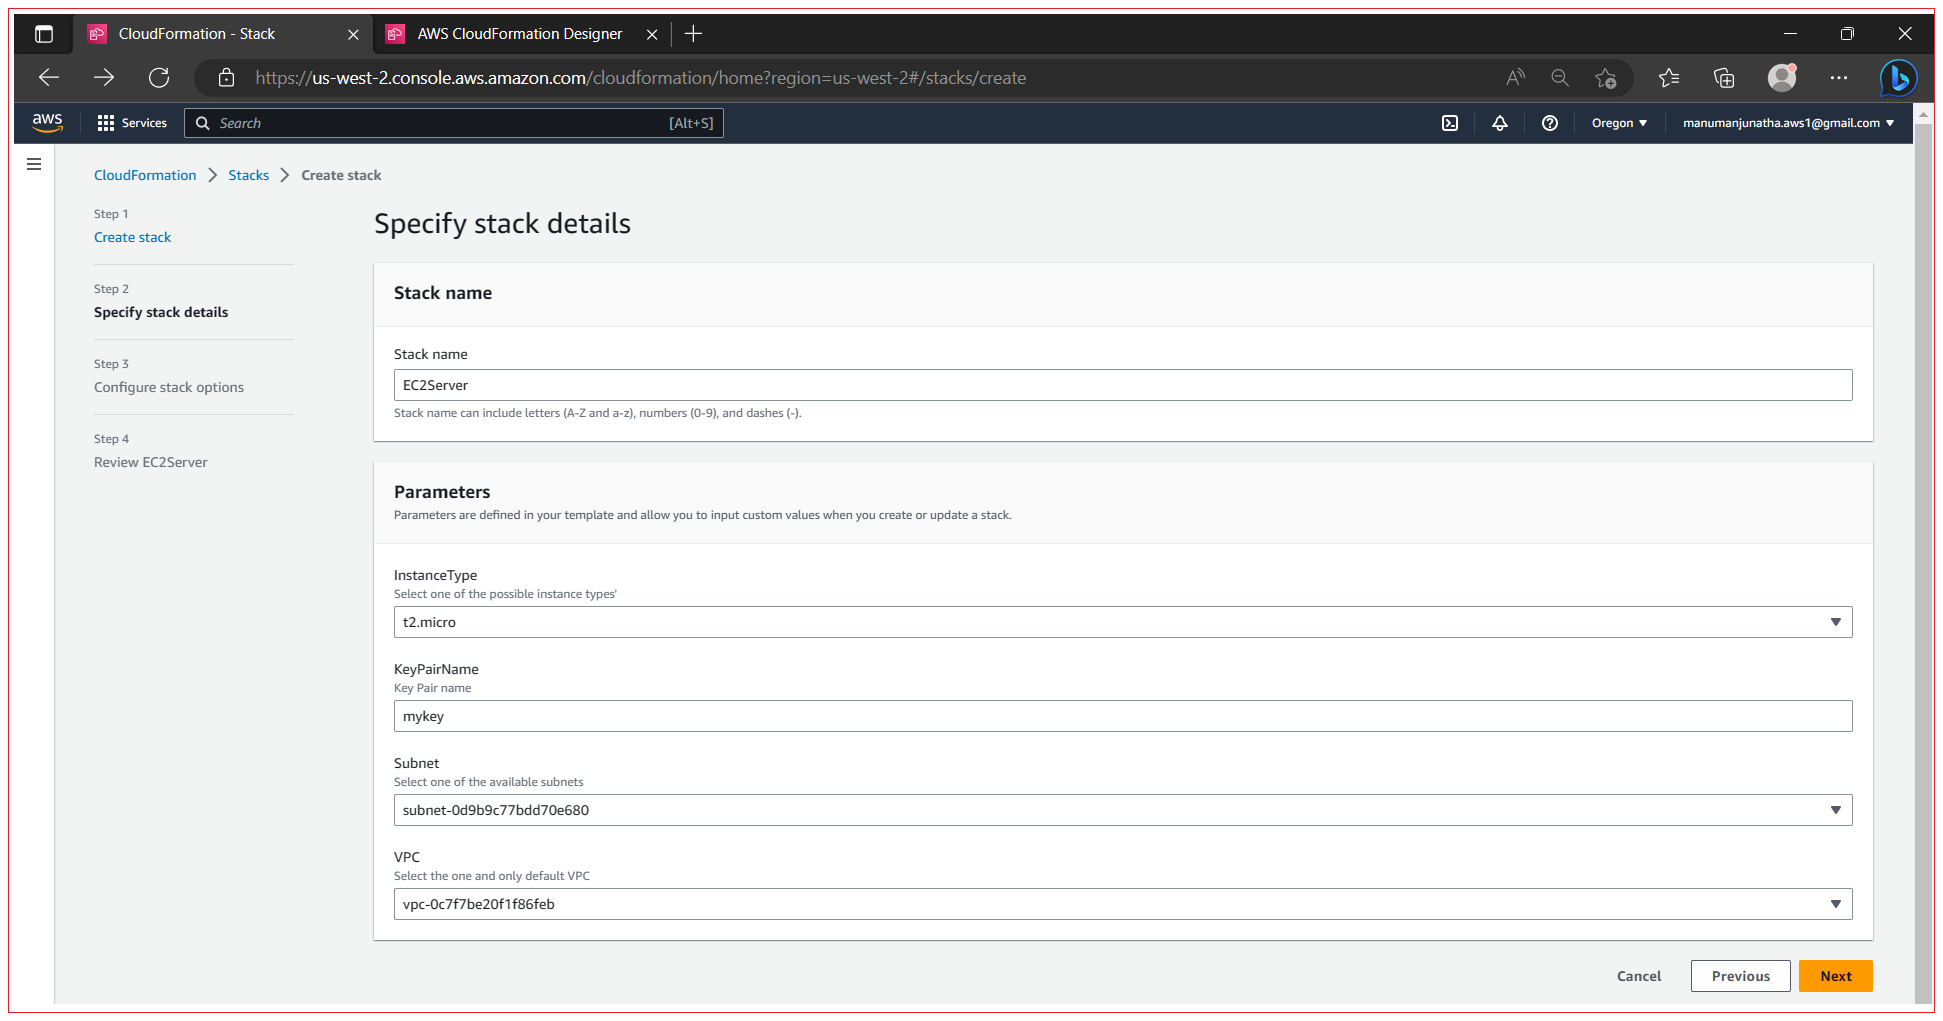
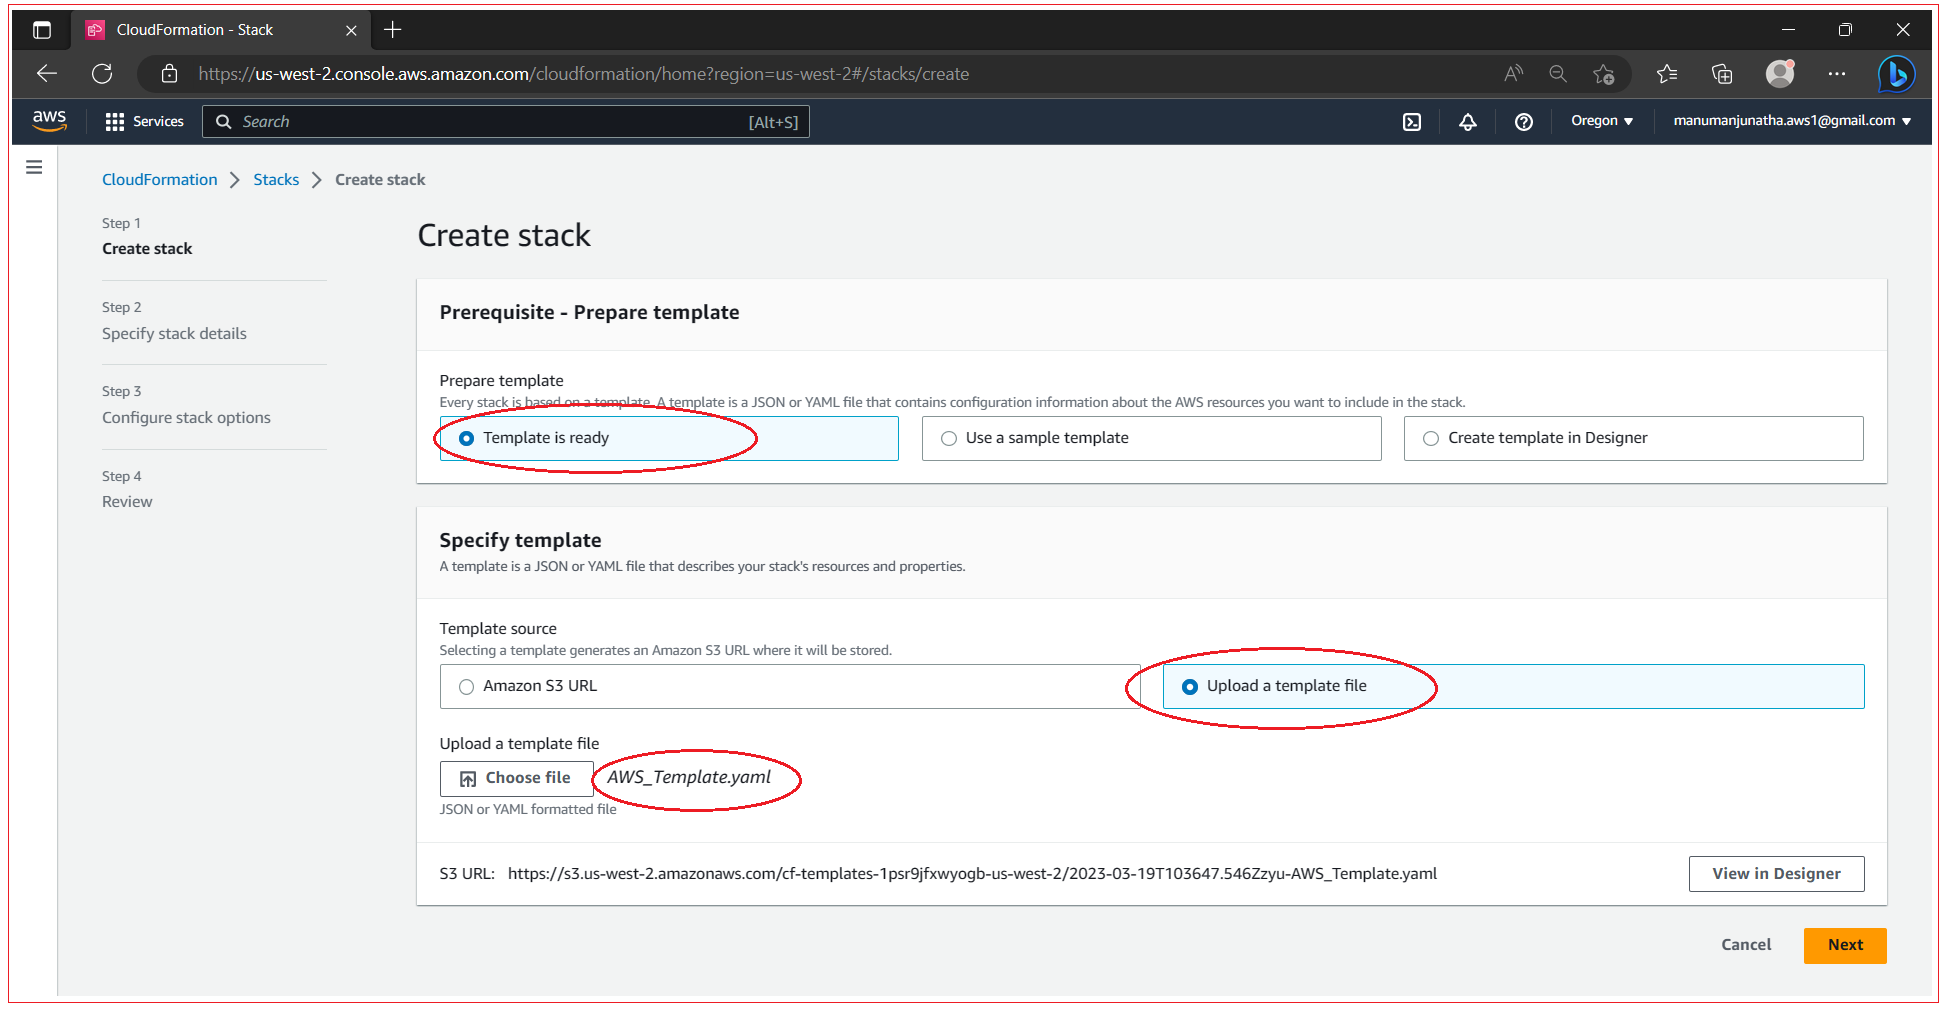
Step 2: Upload the template
Save the below template to a file and upload this in the console. After uploading, click on Next.
AWSTemplateFormatVersion: 2010-09-09
Description: Create stack by uploading a template from AWS console
Parameters:
KeyPairName:
Description: 'Key Pair name'
Type: 'String'
Default: 'mykey'
VPC:
Description: Select the one and only default VPC
Type: 'AWS::EC2::VPC::Id'
Subnet:
Description: Select one of the available subnets
Type: 'AWS::EC2::Subnet::Id'
InstanceType:
Description: Select one of the possible instance types'
Type: String
Default: t2.micro
AllowedValues:
- t2.micro
- t2.small
- t2.medium
Mappings:
RegionMap:
ap-south-1:
AMI: ami-2ed19c41
eu-west-3:
AMI: ami-c8a017b5
eu-west-2:
AMI: ami-e3051987
eu-west-1:
AMI: ami-760aaa0f
ap-northeast-2:
AMI: ami-fc862292
ap-northeast-1:
AMI: ami-2803ac4e
sa-east-1:
AMI: ami-1678037a
ca-central-1:
AMI: ami-ef3b838b
ap-southeast-1:
AMI: ami-dd7935be
ap-southeast-2:
AMI: ami-1a668878
eu-central-1:
AMI: ami-e28d098d
us-east-1:
AMI: ami-6057e21a
us-east-2:
AMI: ami-aa1b34cf
us-west-1:
AMI: ami-1a033c7a
us-west-2:
AMI: ami-32d8124a
Resources:
KeyPair:
Type: 'AWS::EC2::KeyPair'
Properties:
KeyName: !Ref KeyPairName
SecurityGroup:
Type: 'AWS::EC2::SecurityGroup'
Properties:
GroupDescription: My security group
VpcId: !Ref VPC
SecurityGroupIngress:
- CidrIp: 0.0.0.0/0
FromPort: 22
IpProtocol: tcp
ToPort: 22
VM:
Type: 'AWS::EC2::Instance'
Properties:
ImageId: !FindInMap
- RegionMap
- !Ref 'AWS::Region'
- AMI
InstanceType: !Ref InstanceType
KeyName: !Ref KeyPair # <-- Change to use your key-pair name
SecurityGroupIds:
- !Ref SecurityGroup
SubnetId: !Ref Subnet
Outputs:
PublicName:
Value: !GetAtt VM.PublicDnsName
Description: Public name (connect via SSH as user ec2-user) |
Step 3: Specify stack details and parameters
Enter the stack name as “EC2Server” or any convenient name for your requirement, select the parameters and click Next.
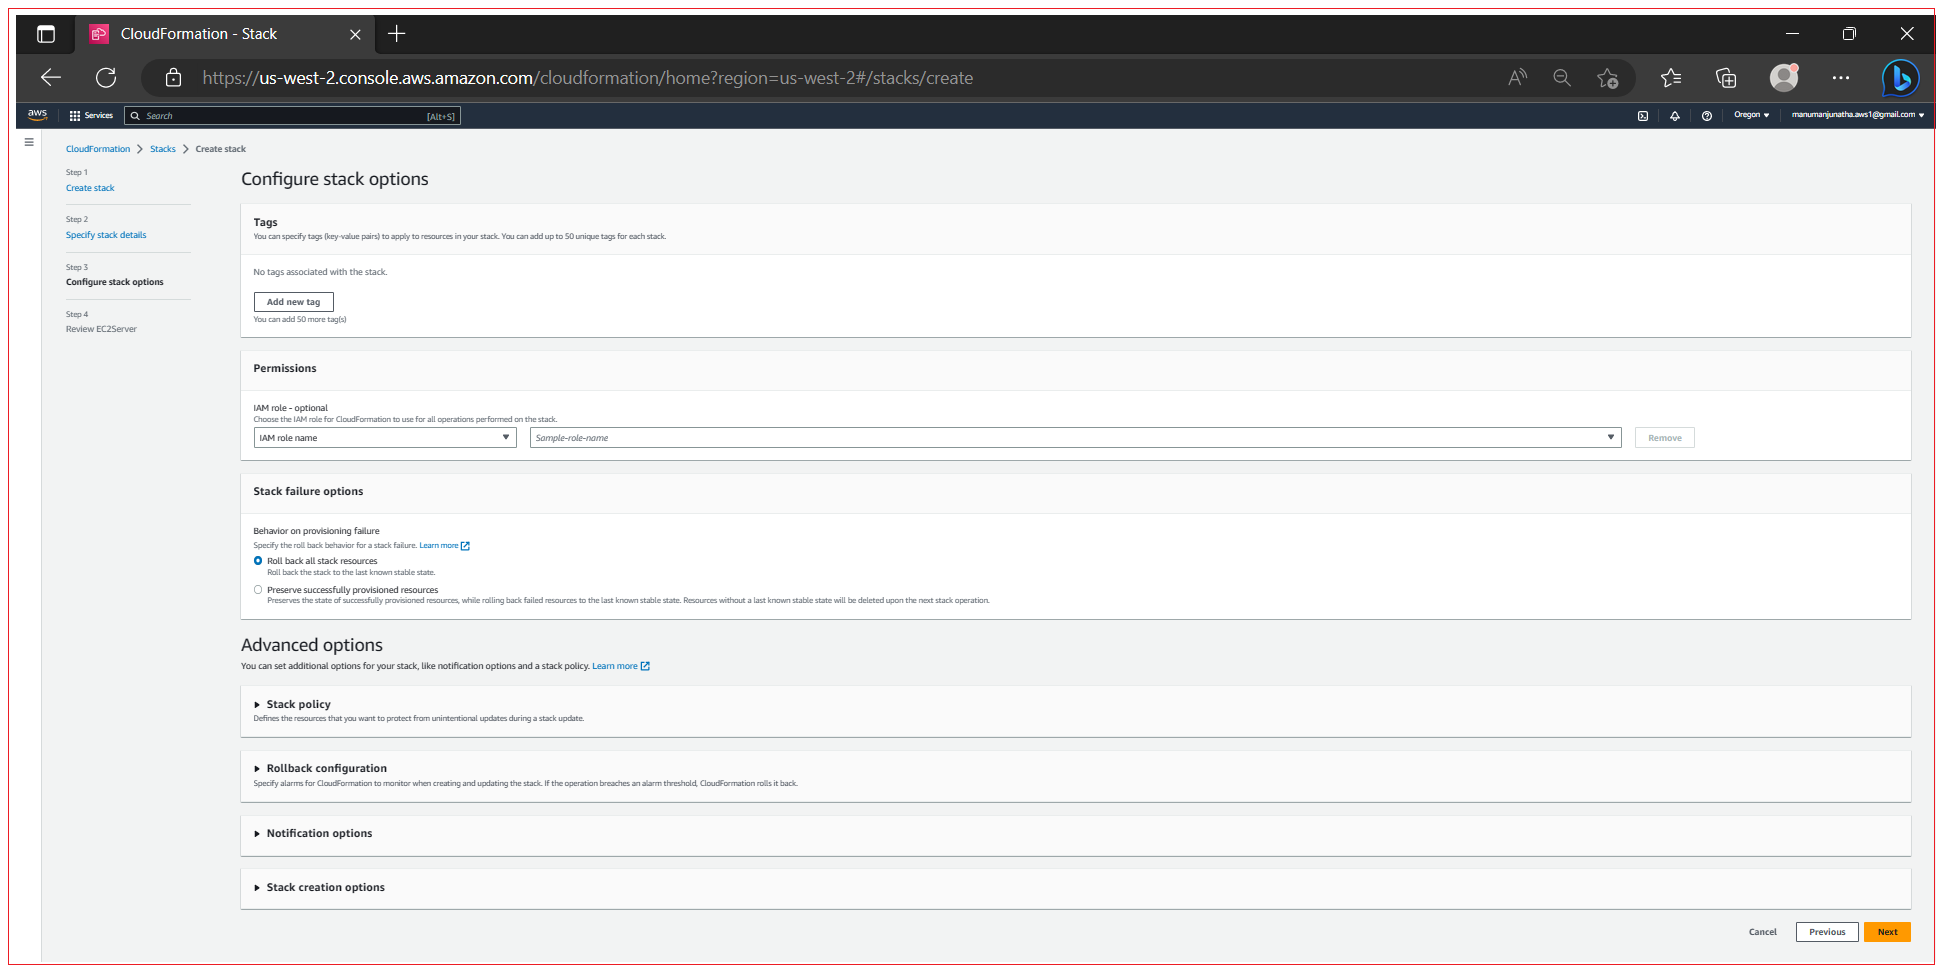
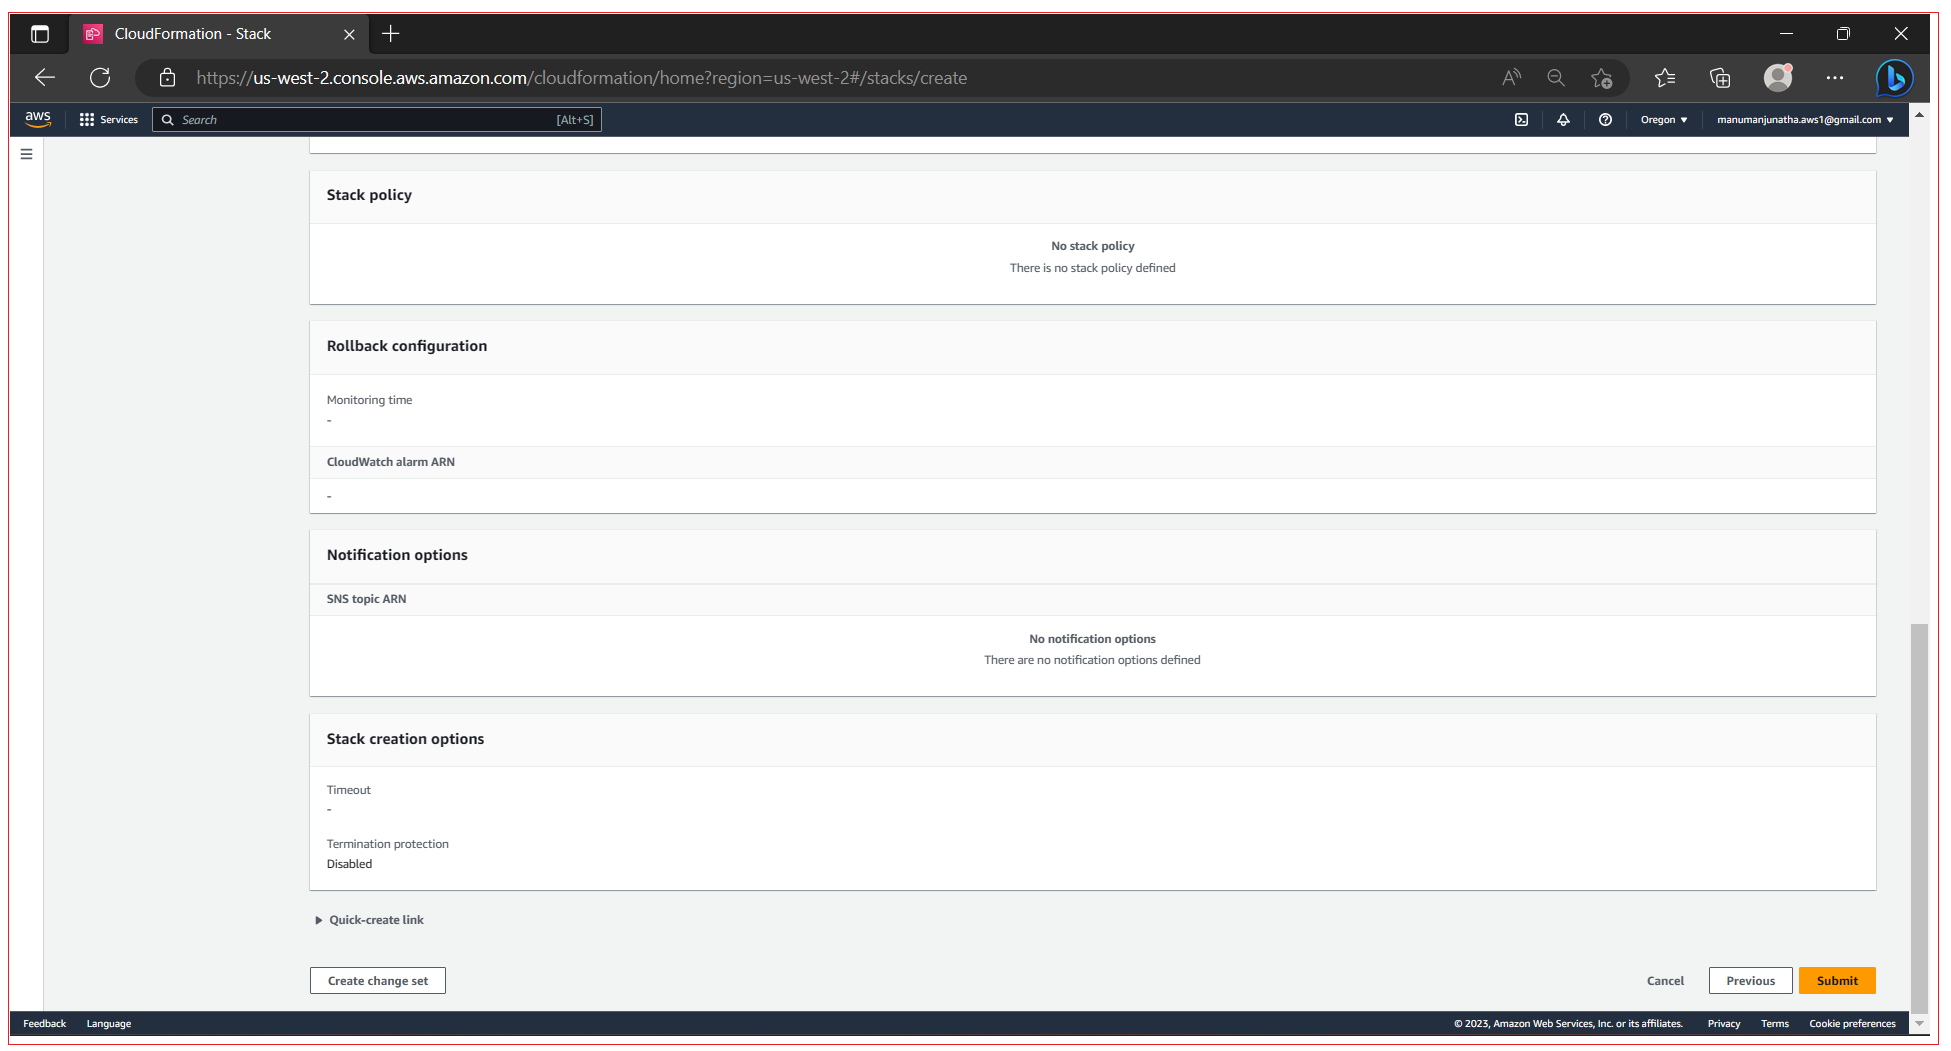
Configure stack options, Enter the tag name, configure Permissions, configure Stack failure options, You can set additional options for your stack, like notification options and a stack policy. Once all done, click Next.
After you click Next, console navigates to step where you can review the details. Review all the details and click Submit.
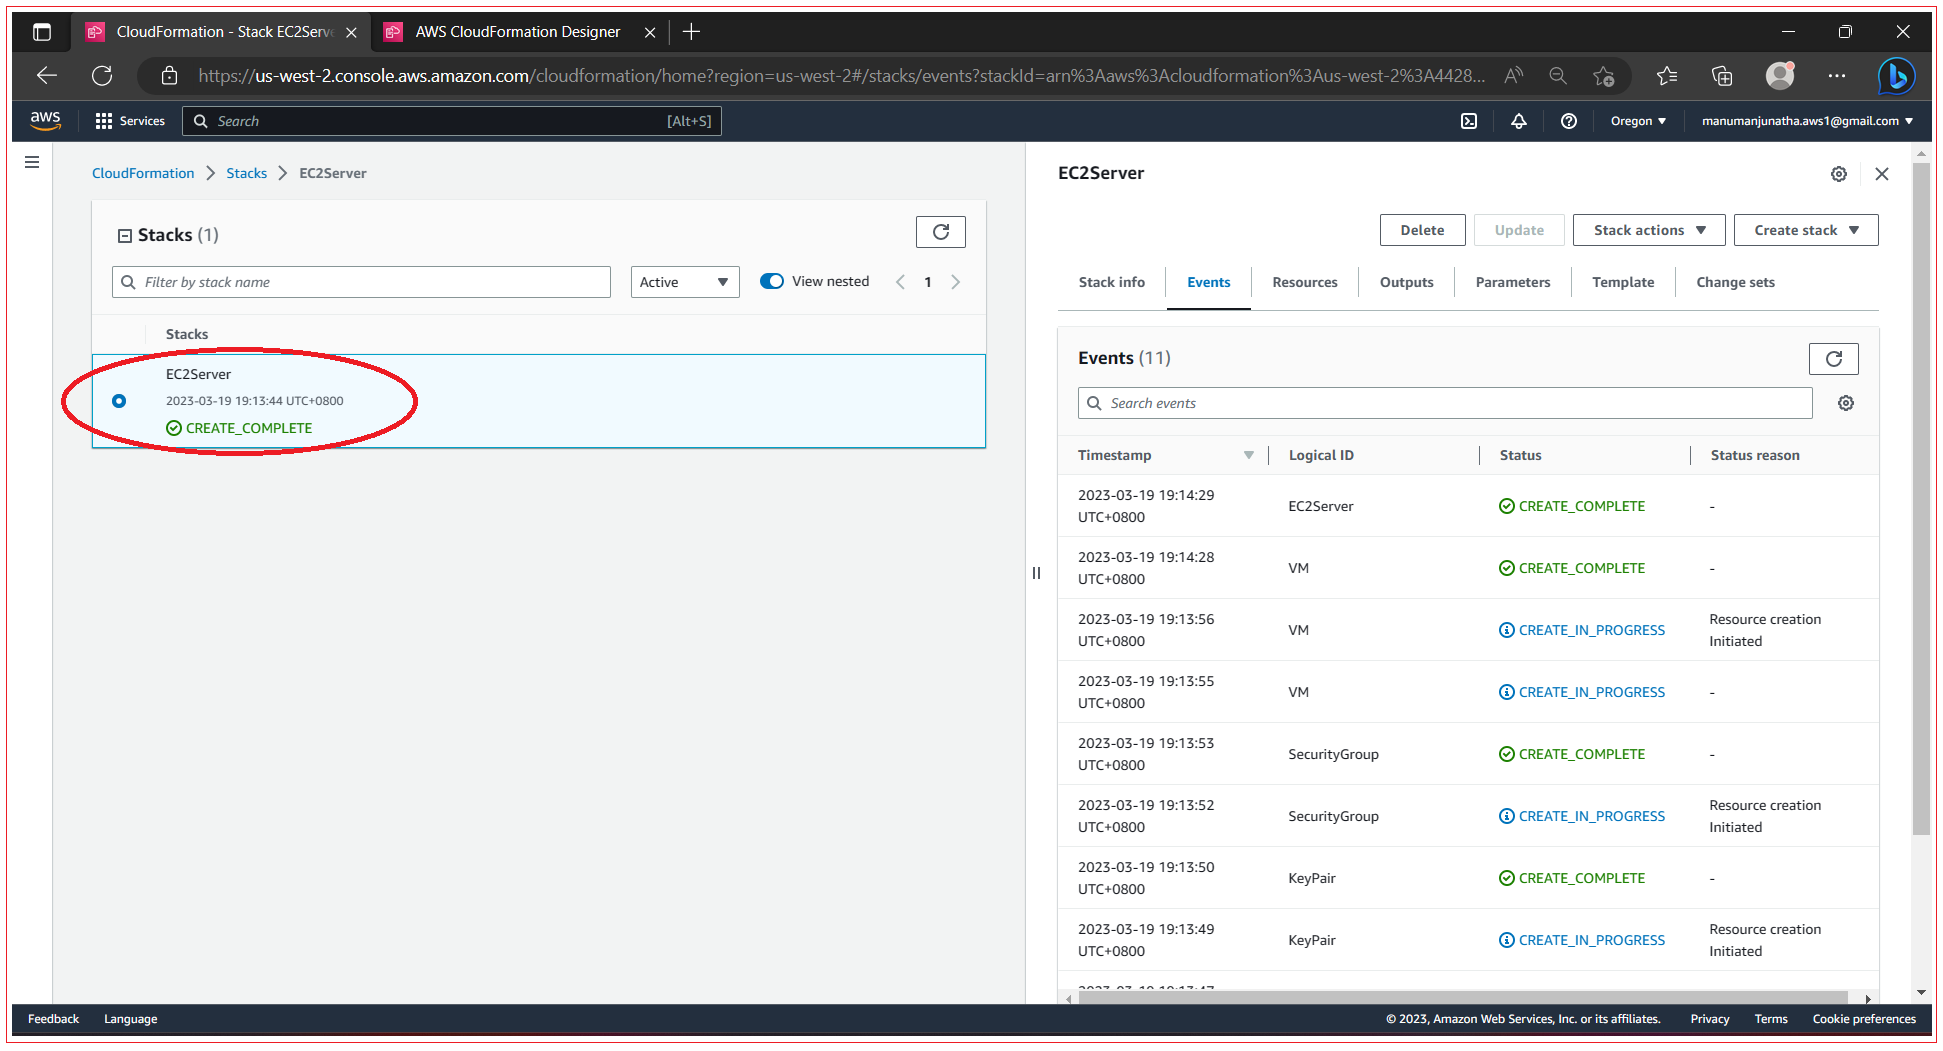
CloudFormation now starts to create the stack. If the process is successful, you’ll see the below screen. As long as Status is CREATE_IN_PROGRESS, you need to be patient. When Status is CREATE_COMPLETE, select the stack and click the Outputs tab to see the public name of the EC2 instance.
How do you execute post deployment script after virtual machine is started?
UserData property of AWS::EC2::Instance resource type allows to defines a shell script as user data for the virtual machine. The user data contains a small script to fetch and execute the real script which can contain all the commands for installing the executables and configuring the services. Doing so frees you from inserting complicated scripts in the CloudFormation template.
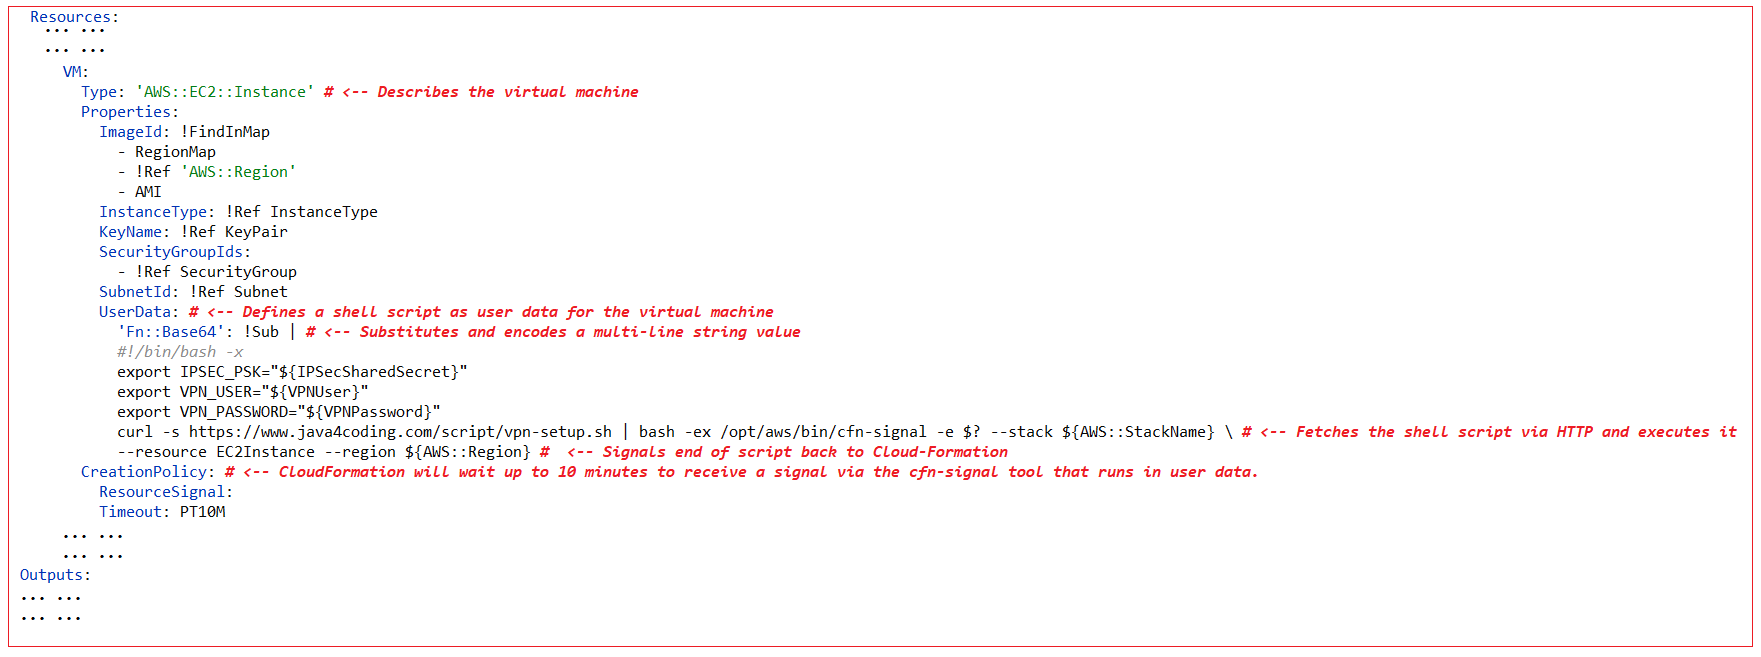
Resources:
… … … … VM:
Type: 'AWS::EC2::Instance' # <-- Describes the virtual machine
Properties:
ImageId: !FindInMap
- RegionMap
- !Ref 'AWS::Region'
- AMI
InstanceType: !Ref InstanceType
KeyName: !Ref KeyPair
SecurityGroupIds:
- !Ref SecurityGroup
SubnetId: !Ref Subnet
UserData: # <-- Defines a shell script as user data for the virtual machine
'Fn::Base64': !Sub | # <-- Substitutes and encodes a multi-line string value
#!/bin/bash -x
export IPSEC_PSK="${IPSecSharedSecret}"
export VPN_USER="${VPNUser}"
export VPN_PASSWORD="${VPNPassword}"
curl -s https://www.java4coding.com/script/vpn-setup.sh | bash -ex /opt/aws/bin/cfn-signal -e $? --stack ${AWS::StackName} \ # <-- Fetches the shell script via HTTP and executes it
--resource EC2Instance --region ${AWS::Region} # <-- Signals end of script back to Cloud-Formation
CreationPolicy: # <-- CloudFormation will wait up to 10 minutes to receive a signal via the cfn-signal tool that runs in user data.
ResourceSignal:
Timeout: PT10M
Outputs: … … |