
| ☰ See All Chapters |
REST Example
In this tutorial we have provided Hello World REST Example Using JAX-RS Specification and Jersey implementation. Unlike SOAP we don’t need the support from SOAPUI tool to test REST service. We just use web browser to see the REST service response. Follow the below steps to create REST Hello World example.
Step 1: Create a dynamic web project.
Step 2: Add Jersey implementation Jars by downloading from the following location.
(Google search key word “jax rs jersey jar download”)
https://jersey.github.io/download.html
Or click here to download the jars that we have used.
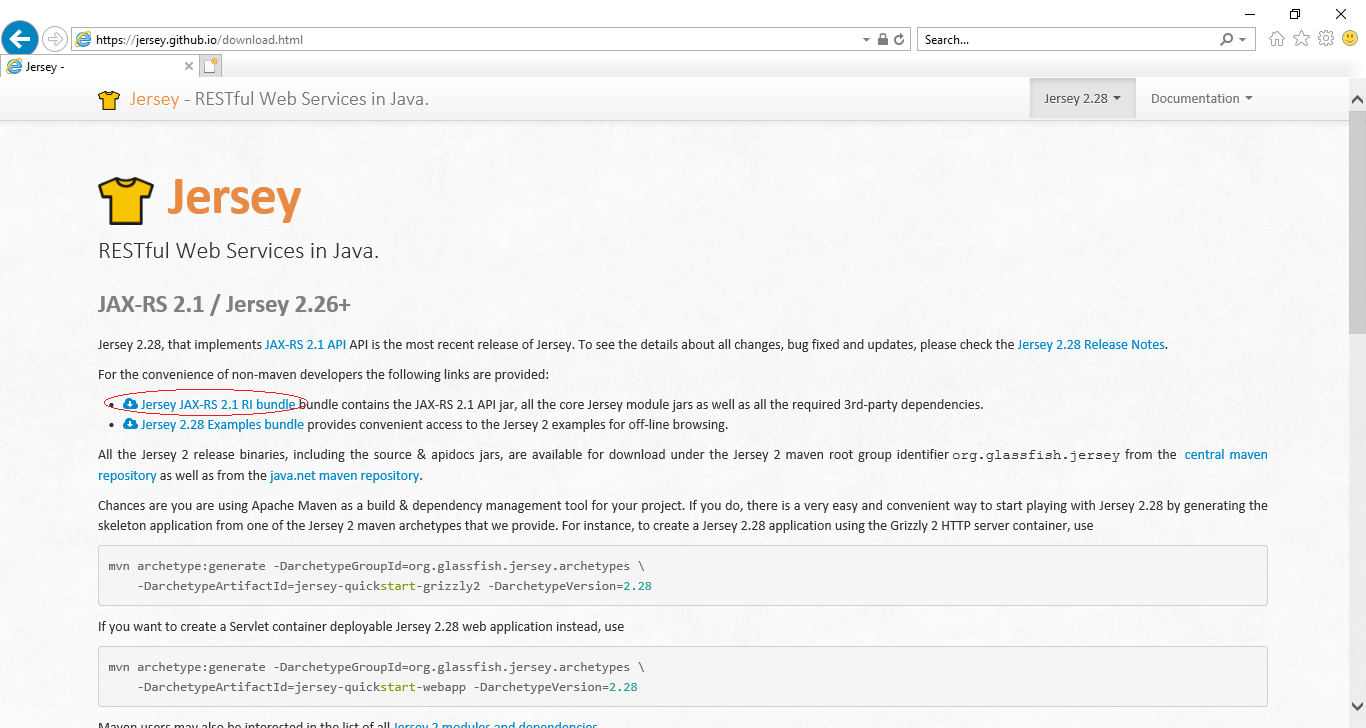
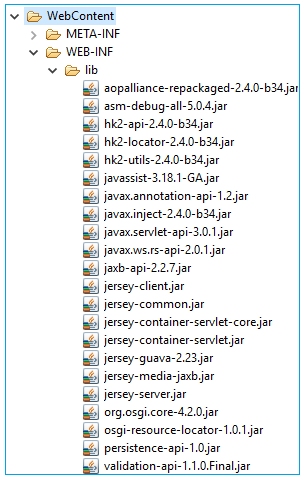
Now we will get jaxrs-ri-2.28.zip, extract the zip file. Copy all the jars present in lib, ext and api directories into “WebContent/WEB-INF/ lib” directory of project.
Step 3: Now create a Restful services using annotations.
HelloWorldService.java
package com.java4coding;
import javax.ws.rs.GET; import javax.ws.rs.Path; import javax.ws.rs.Produces;
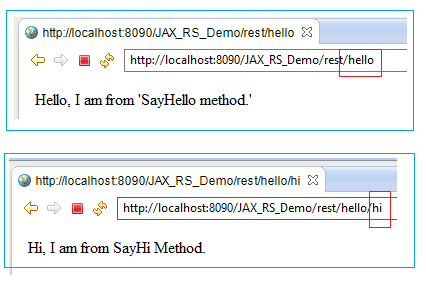
@Path("/hello") public class HelloWorldService { @GET @Produces("text/html") public String sayHello() { return "Hello, I am from 'SayHello method.'"; } @GET @Path("/hi") @Produces("text/html") public String sayHi() { return "Hi, I am from SayHi Method."; } } |
Step 4: In web.xml, configure service as below.
web.xml
<web-app id="WebApp_ID" version="2.4" xmlns="https://java.sun.com/xml/ns/j2ee" xmlns:xsi="https://www.w3.org/2001/XMLSchema-instance" xsi:schemaLocation="https://java.sun.com/xml/ns/j2ee https://java.sun.com/xml/ns/j2ee/web-app_2_4.xsd">
<servlet> <servlet-name>jersey-serlvet</servlet-name> <!-- For Jersey 1.7 use commented part, otherwise for jersey 2.0 use as below --> <!-- <servlet-class>com.sun.jersey.spi.container.servlet.ServletContainer</servlet-class> --> <servlet-class>org.glassfish.jersey.servlet.ServletContainer</servlet-class> <init-param> <!-- For Jersey 1.7 use commented part, otherwise for jersey 2.0 use as below --> <!-- <param-name>com.sun.jersey.config.property.packages</param-name> --> <param-name>jersey.config.server.provider.packages</param-name> <param-value>com.java4coding</param-value> </init-param> <load-on-startup>1</load-on-startup> </servlet>
<servlet-mapping> <servlet-name>jersey-serlvet</servlet-name> <url-pattern>/rest/*</url-pattern> </servlet-mapping>
</web-app> |
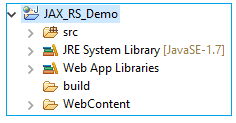
Final project directory structure is

Step 5: Deploy the project to any server (Lets consider Tomcat), Just right click on the project >Run As > Run on Server >Select Tomcat server.
Open the below URL in browser. (Change the project name and port number according to your setup)
https://localhost:8090/JAX_RS_Demo/rest/hello

In above example we developed Restful web service using Jersey implementation. Suppose if we change the implementation then we need to configure different servlet as given by that implementation, rest all the code will remain same.
All Chapters
