
| ☰ See All Chapters |
Liquibase Tutorial
This liquibase tutorial shows you how to manage your database objects without writing and without depending on SQL queries. This brings the concept of one query over multiple tables, query being written using database neutral language like XML, JSON, and YAML. Liquibase is a data base change management tool. In an application if you modify any tables for any requirements and if you want to revert to the old versions, liquibase can be used safely. Also, liquibase provides database neutral way to perform create, update, and delete operations. We can write the changes in xml files and can be applied to any database. Suppose if five instances of same application are running in five different data bases then to apply data base changes writing different SQL statements for different database is time consuming. Liquibase provides xml tags and attributes to apply data base changes. Rather than writing SQL directly against the database to create, update or drop database objects, we can define database changes in XML/JSON/YAML files. Such files are called as databaseChangeLog files.
Advantages of Liquibase
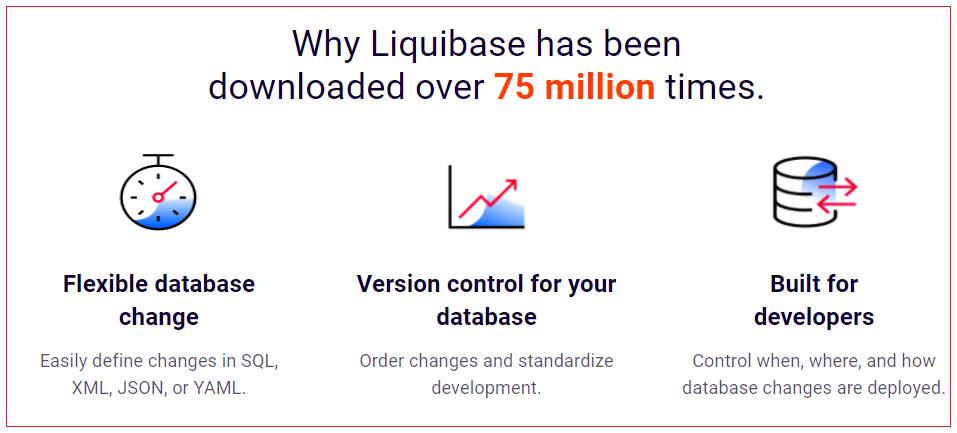
Flexible database change: Queries are written using database neutral language like XML, JSON, and YAML. Single query written can be used for multiple databases. Without liquibase you would need to write separate SQL queries for different databases.
Version control for your database: Maintaining definitions in XML, JSON, YAML neutral languages is easier than maintaining different SQL files for different databases. Order changes and standardize development.
Version-controlled database schema changes
Automatically orders scripts for deployment
Branching and merging for teams
Embeds into your product or build tools, like Jenkins
Easily rollback changes
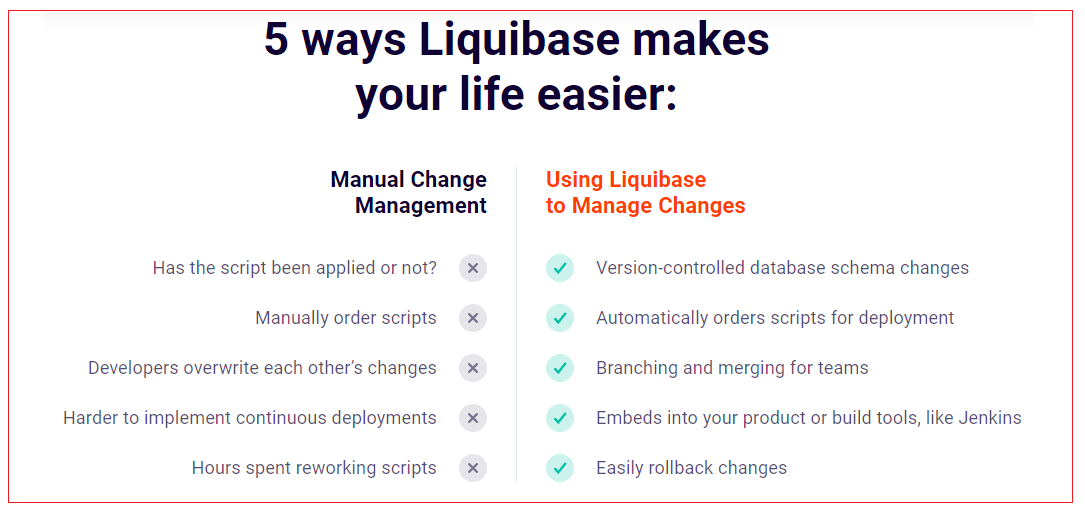
Built for developers: Control when, where, and how database changes are deployed.
Liquibase works with a wide range of databases: It supports more than 30 different databases. While database migration liquibase Change Log files can be used without rewriting SQL statements for new database. It saves developers effort and increase productivity.
Liquibase is popular: According to official website from Liquibase, Liquibase has been downloaded over 75 million times.
Database Change Log
Below xml is a sample construct to create two tables. This liquibase script creates two tables, student and employee. This can be used for any relational database, no modification required. Hence it helps while database migration.
<databaseChangeLog xmlns="https://www.liquibase.org/xml/ns/dbchangelog" xmlns:xsi="https://www.w3.org/2001/XMLSchema-instance" xsi:schemaLocation="https://www.liquibase.org/xml/ns/dbchangelog https://www.liquibase.org/xml/ns/dbchangelog/dbchangelog-3.6.xsd">
<changeSet id="create_student" author="manu.manjunatha"> <createTable tableName="student"> <column name="id" type="int"> <constraints primaryKey="true" nullable="false" /> </column> <column name="name" type="varchar(50)"> <constraints nullable="false" /> </column> </createTable> </changeSet>
<changeSet id="create_employee" author="manu.manjunatha"> <createTable tableName="employee"> <column name="id" type="int"> <constraints primaryKey="true" nullable="false" /> </column> <column name="firstname" type="varchar(50)"> <constraints nullable="false" /> </column> <column name="lastname" type="varchar(50)"> <constraints nullable="false" /> </column> </createTable> </changeSet>
</databaseChangeLog> |
The base tag is databaseChangeLog, any change to database are kept inside changeSet. The same code can be written using YAML as below:
databaseChangeLog: changeSet: - createTable: column: - constraints: primaryKey: true nullable: false name: id type: int - constraints: nullable: false name: name type: "varchar(50)" tableName: student id: createstudent author: "manu.manjunatha" - createTable: column: - constraints: primaryKey: true nullable: false name: id type: int - constraints: nullable: false name: firstname type: "varchar(50)" - constraints: nullable: false name: lastname type: "varchar(50)" tableName: employee id: createemployee author: "manu.manjunatha" |
For best readability we should use one changeset per modification. This also helps in rollback and to apply older changes easily. We can tag the changes to releases. For example, we can tag database structure to first version after first release. Later if patch releases, we can tag 1.1 release. This tagging helps to rollback to any version easily.
<databaseChangeLog xmlns="https://www.liquibase.org/xml/ns/dbchangelog" xmlns:xsi="https://www.w3.org/2001/XMLSchema-instance" xsi:schemaLocation="https://www.liquibase.org/xml/ns/dbchangelog https://www.liquibase.org/xml/ns/dbchangelog/dbchangelog-3.6.xsd">
… … … … … …
<changeSet id="release_1.0" author="manu.manjunatha"> <tagDatabase tag="1.0" /> </changeSet>
</databaseChangeLog>
|
id and author field should not be given empty. These values will be used for tracking the changes.
How to execute liquibase?
To process databaseChangeLog files, liquibase should be installed in your system. Follow our next chapter How To Install Liquibase to know how to install liquibase. After installation, to execute we have below ways to execute liquibase.
1. Execute liquibase command from command prompt/terminal
2. Using Maven plugin
3. Using SpringLiquibase
Execute liquibase command from command prompt/terminal
liquibase command takes two arguments, one is the location to change log file and another is the location to property file which should have the database connection details. Below is an example on how to execute liquibase from command prompt/terminal.
liquibase.properties
driver=com.mysql.cj.jdbc.Driver url=jdbc:mysql://localhost:3306/liquibase username=root password=root
|
changelog_1.0.xml
<databaseChangeLog xmlns="https://www.liquibase.org/xml/ns/dbchangelog" xmlns:xsi="https://www.w3.org/2001/XMLSchema-instance" xsi:schemaLocation="https://www.liquibase.org/xml/ns/dbchangelog https://www.liquibase.org/xml/ns/dbchangelog/dbchangelog-3.6.xsd">
<changeSet id="create_student" author="manu.manjunatha"> <createTable tableName="student"> <column name="id" type="int"> <constraints primaryKey="true" nullable="false" /> </column> <column name="name" type="varchar(50)"> <constraints nullable="false" /> </column> </createTable> </changeSet>
<changeSet id="create_employee" author="manu.manjunatha"> <createTable tableName="employee"> <column name="id" type="int"> <constraints primaryKey="true" nullable="false" /> </column> <column name="firstname" type="varchar(50)"> <constraints nullable="false" /> </column> <column name="lastname" type="varchar(50)"> <constraints nullable="false" /> </column> </createTable> </changeSet>
</databaseChangeLog> |
Open command prompt for the folder having changelog_1.0.xml and liquibase.properties file and execute the below command:
liquibase --defaultsFile=C:\Liquibase_example\liquibase.properties --changeLogFile=C:\Liquibase_example\changelog_1.0.xml update

Using Maven plugin
We can use maven plugin to execute the liquibase changelog files. Plug configuration includes the configuration the location to change log file and the location to property file which should have the database connection details. Below is an example for maven pom.xml.
<project xmlns="https://maven.apache.org/POM/4.0.0" xmlns:xsi="https://www.w3.org/2001/XMLSchema-instance" xsi:schemaLocation="https://maven.apache.org/POM/4.0.0 https://maven.apache.org/maven-v4_0_0.xsd"> <modelVersion>4.0.0</modelVersion> <groupId>com.java4coding</groupId> <artifactId>LiquibaseDemo</artifactId> <packaging>jar</packaging> <version>1.0-SNAPSHOT</version> <name>LiquibaseDemo</name> <url>https://maven.apache.org</url> <properties> <project.build.sourceEncoding>UTF-8</project.build.sourceEncoding> </properties>
<dependencies> <dependency> <groupId>mysql</groupId> <artifactId>mysql-connector-java</artifactId> <version>8.0.16</version> </dependency>
</dependencies>
<build> <finalName>liquibase-demo</finalName> <plugins> <plugin> <groupId>org.apache.maven.plugins</groupId> <artifactId>maven-compiler-plugin</artifactId> <version>3.8.1</version> <configuration> <source>1.8</source> <target>1.8</target> </configuration> </plugin>
<plugin> <groupId>org.liquibase</groupId> <artifactId>liquibase-maven-plugin</artifactId> <version>3.4.2</version> <configuration> <propertyFile>src/main/resources/liquibase.properties</propertyFile> <changeLogFile>src/main/resources/changelog_1.0.xml</changeLogFile> </configuration> </plugin> </plugins> </build> </project> |
Execute the maven command “mvn liquibase:update” to apply database changes.
Generate a changelog from an existing database
If you are doing database migration, Instead of writing the changeLog file manually or creating database sql scripts manually– we can use the Liquibase Maven plugin to generate changeLog by reading existing database and then execute the generated changelog for the new database. This saves our lots of work. Below is how plugin configuration done in pom.xml to generate changelog files.
<project xmlns="https://maven.apache.org/POM/4.0.0" xmlns:xsi="https://www.w3.org/2001/XMLSchema-instance" xsi:schemaLocation="https://maven.apache.org/POM/4.0.0 https://maven.apache.org/maven-v4_0_0.xsd"> <modelVersion>4.0.0</modelVersion> <groupId>com.java4coding</groupId> <artifactId>LiquibaseDemo</artifactId> <packaging>jar</packaging> <version>1.0-SNAPSHOT</version> <name>LiquibaseDemo</name> <url>https://maven.apache.org</url> <properties> <project.build.sourceEncoding>UTF-8</project.build.sourceEncoding> </properties>
<dependencies> <dependency> <groupId>mysql</groupId> <artifactId>mysql-connector-java</artifactId> <version>8.0.16</version> </dependency>
</dependencies>
<build> <finalName>liquibase-demo</finalName> <plugins> <plugin> <groupId>org.apache.maven.plugins</groupId> <artifactId>maven-compiler-plugin</artifactId> <version>3.8.1</version> <configuration> <source>1.8</source> <target>1.8</target> </configuration> </plugin>
<plugin> <groupId>org.liquibase</groupId> <artifactId>liquibase-maven-plugin</artifactId> <version>3.4.2</version> <configuration> <propertyFile>src/main/resources/liquibase.properties</propertyFile> <outputChangeLogFile>src/main/resources/ouput/generatedchangelog.xml</outputChangeLogFile> </configuration> </plugin> </plugins> </build> </project> |
Execute the maven command “mvn liquibase:generateChangeLog” to generate changelog file.
Generate a changelog from diff between two databases
Assume you have made changes to your development environment to implement certain requirements, now those changes from development database should be applied to production database too. In this case you can use the plugin to generate a changelog file from the differences between two existing databases:
<project xmlns="https://maven.apache.org/POM/4.0.0" xmlns:xsi="https://www.w3.org/2001/XMLSchema-instance" xsi:schemaLocation="https://maven.apache.org/POM/4.0.0 https://maven.apache.org/maven-v4_0_0.xsd"> <modelVersion>4.0.0</modelVersion> <groupId>com.java4coding</groupId> <artifactId>LiquibaseDemo</artifactId> <packaging>jar</packaging> <version>1.0-SNAPSHOT</version> <name>LiquibaseDemo</name> <url>https://maven.apache.org</url> <properties> <project.build.sourceEncoding>UTF-8</project.build.sourceEncoding> </properties>
<dependencies> <dependency> <groupId>mysql</groupId> <artifactId>mysql-connector-java</artifactId> <version>8.0.16</version> </dependency>
</dependencies>
<build> <finalName>liquibase-demo</finalName> <plugins> <plugin> <groupId>org.apache.maven.plugins</groupId> <artifactId>maven-compiler-plugin</artifactId> <version>3.8.1</version> <configuration> <source>1.8</source> <target>1.8</target> </configuration> </plugin>
<plugin> <groupId>org.liquibase</groupId> <artifactId>liquibase-maven-plugin</artifactId> <version>3.4.2</version> <referenceUrl>jdbc:mysql://localhost:3306/local</referenceUrl> <referenceDriver>com.mysql.jdbc.Driver</referenceDriver> <referenceUsername>root</referenceUsername> <referencePassword></referencePassword> <configuration> <changeLogFile>src/main/resources/changelog-master.xml</changeLogFile> <diffChangeLogFile>src/main/resources/differences.changelog.xml</diffChangeLogFile> <outputChangeLogFile>src/main/resources/output.changelog.xml</outputChangeLogFile> <driver>com.mysql.jdbc.Driver</driver> <url>jdbc:mysql://localhost:3306/liquibase</url> <defaultSchemaName>liquibase</defaultSchemaName> <username>root</username> <password>root</password> <referenceUrl>jdbc:mysql://localhost:3306/liquibase-ref</referenceUrl> <referenceDriver>com.mysql.jdbc.Driver</referenceDriver> <referenceUsername>root</referenceUsername> <referencePassword>root</referencePassword> <verbose>true</verbose> <logging>debug</logging> </configuration> </plugin> </plugins> </build> </project> |
Execute the maven command “mvn liquibase:diff” to generate difference changelog file.
Using SpringLiquibase
If you application is using spring/spring boot, another simple way to execute liquibase is using liquibase.integration.springSpringLiquibase.
public class SpringLiquibaseExample {
@Bean public SpringLiquibase liquibase(@Qualifier("getLiquibaseDataSource") DataSource dataSource) { SpringLiquibase liquibase = new SpringLiquibase(); liquibase.setDataSource(dataSource); liquibase.setChangeLog("classpath:liquibase/changelog.xml"); liquibase.setContexts(liquiBasePropertyResolver.getProperty("context")); liquibase.setShouldRun(property.getDatasource().isRunLiquibase()); releaseLiquibaseLocks(dataSource); clearLiquibaseCheckSums(dataSource); return liquibase; }
public void BasicDataSource getLiquibaseDataSource() { BasicDataSource dataSource = new BasicDataSource(); dataSource.setDriverClassName("com.mysql.jdbc.Driver"); dataSource.setUsername("username"); dataSource.setPassword("password"); dataSource.setUrl("jdbc:mysql://localhost:3306/liquibase"); dataSource.setMaxActive(10); dataSource.setMaxIdle(5); dataSource.setInitialSize(5); dataSource.setValidationQuery("SELECT 1"); } } |
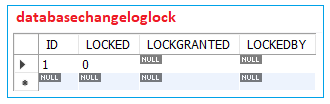
How liquibase track changes?
Liquibase identifies the changes inside changeset. Important thing to remember is liquibase can be used only for Create, Update, Delete operations. Read operation like select statements cannot be performed by liquibase. At very first liquibase execution, liquibase creates two additional tables to track the changes. Databasechangelog and databasechangeloglock are the tables created by liquibase. Below two images shows the tables create by liquibase when we executed our liquibase script.

Please read our next chapters to learn to install liquibase and to create liquibase examples.
All Chapters
