
| ☰ See All Chapters |
JSF example using annotation
In this tutorial you will learn to create JSF example application using maven. In our previous example we have used faces-config.xml to define navigations. In this tutorial we do not use faces-config.xml instead we use javax.faces.bean.ManagedBean annotation.
The presence of ManagedBean annotation on a class automatically registers the class with the runtime as a managed bean class. Classes must be scanned for the presence of this annotation at application startup, before any requests have been serviced.
The value of the name() attribute is taken to be the managed-bean-name. If the value of the name attribute is unspecified or is the empty String, the managed-bean-name is derived from taking the unqualified class name portion of the fully qualified class name and converting the first character to lower case. For example, if the ManagedBean annotation is on a class with the fully qualified class name com.example.Bean, and there is no name attribute on the annotation, the managed-bean-name is taken to be bean. The fully qualified class name of the class to which this annotation is attached is taken to be the managed-bean-class.
Follow the below steps to create the example. Steps are easy and simple that you no need to have any prior knowledge on JSF.
Create java Project using Maven
In the command prompt execute the following maven command to generate Maven supported Java project named as “JSFExampleUsingAnnotation”.
mvn archetype:generate -DgroupId=com.java4coding -DartifactId=JSFExampleUsingAnnotation -DarchetypeArtifactId=maven-archetype-webapp -DinteractiveMode=false
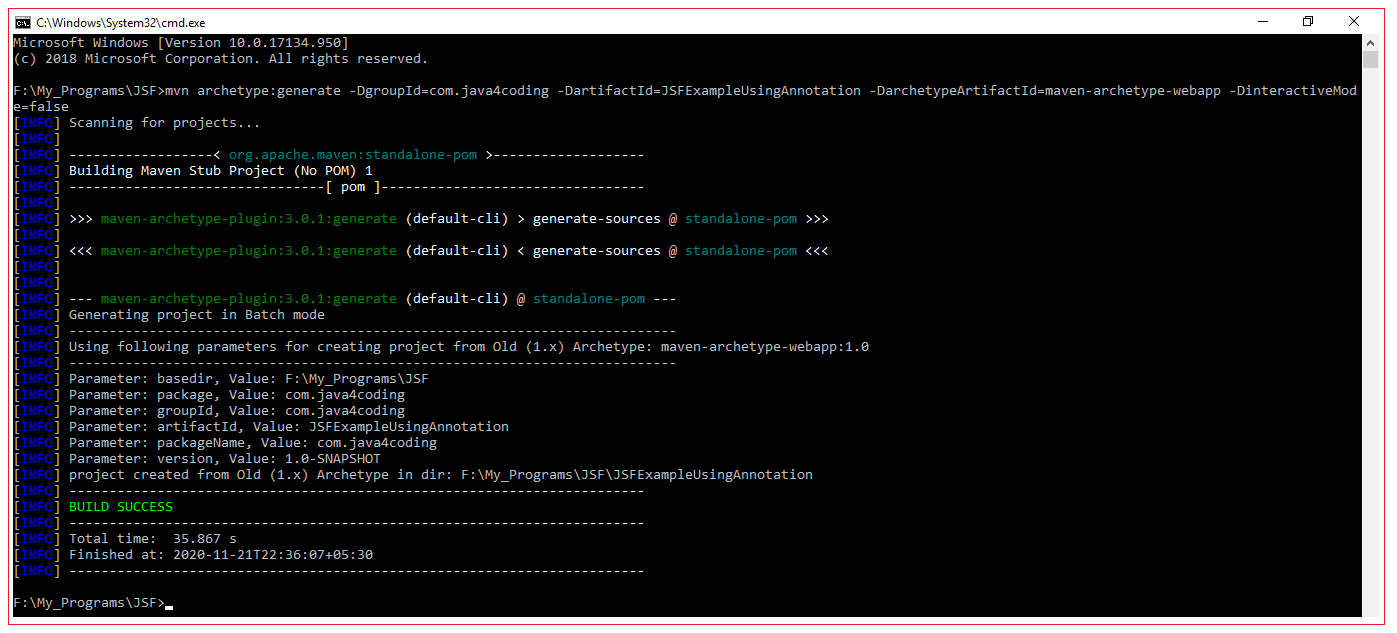
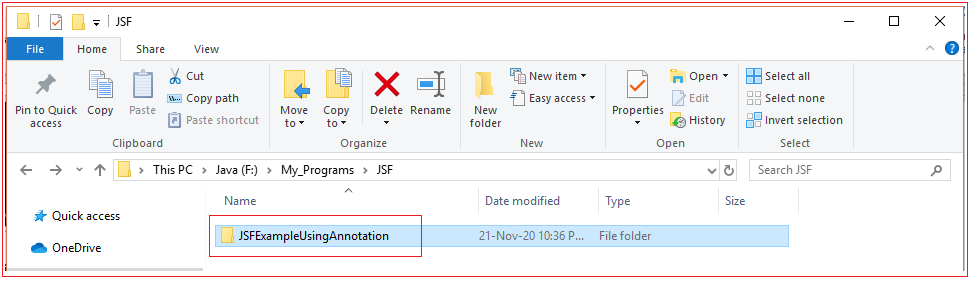
This command creates a new maven Java project with the name “JSFExampleUsingAnnotation”, with complete directory structure.
Convert to eclipse project
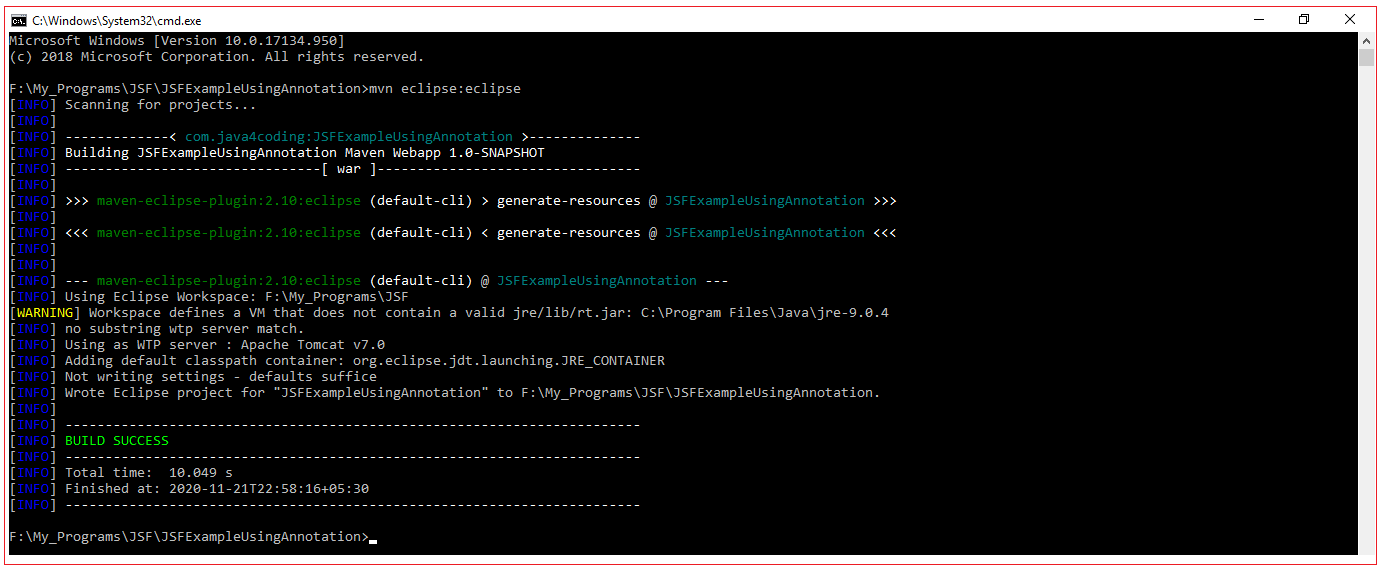
To import Maven project into Eclipse IDE, in terminal, navigate inside “JSFExampleUsingAnnotation” project (folder should has pom.xml file), and issue mvn eclipse:eclipse command.
Import converted project into Eclipse IDE
In Eclipse IDE, Choose File –> Import –> General -> Existing Projects into Workspace –>Choose your project folder location. Done
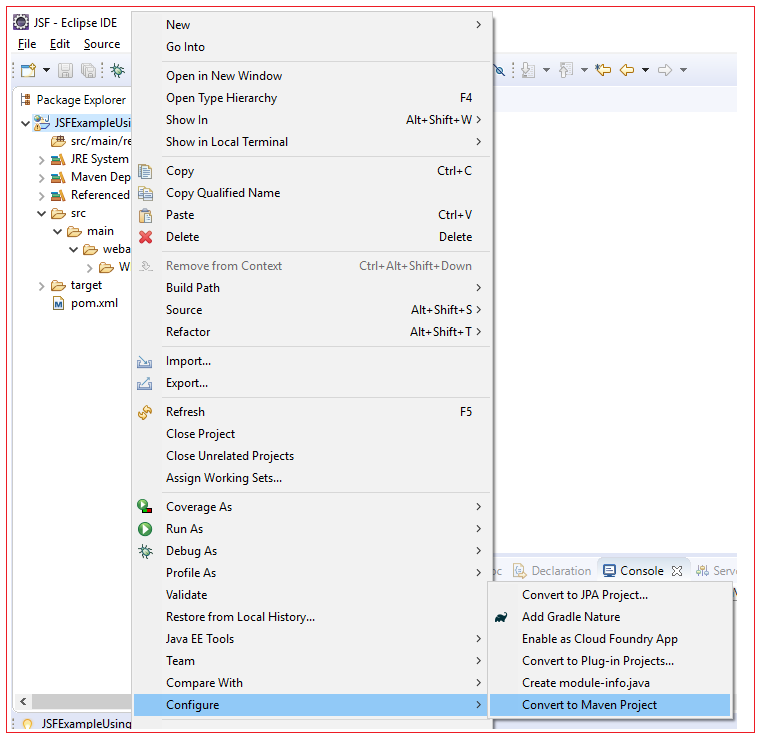
Covert the project to Maven Project in eclipse - Right Click on Project > Configure > Convert to Maven Project
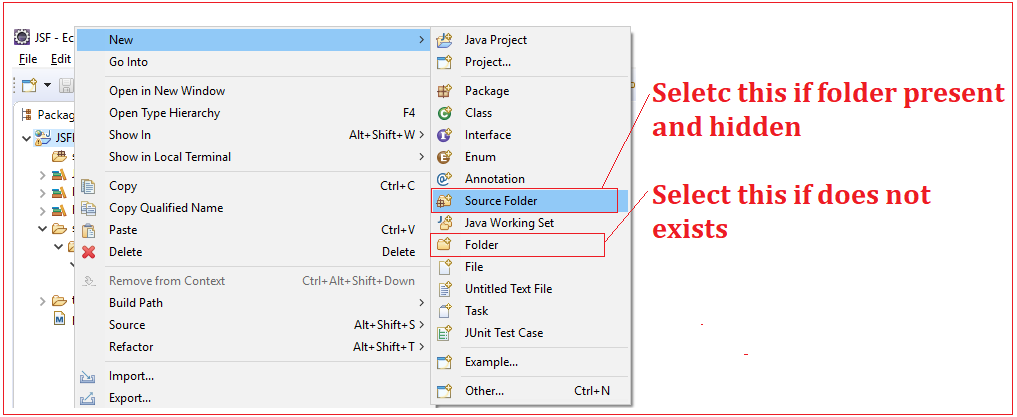
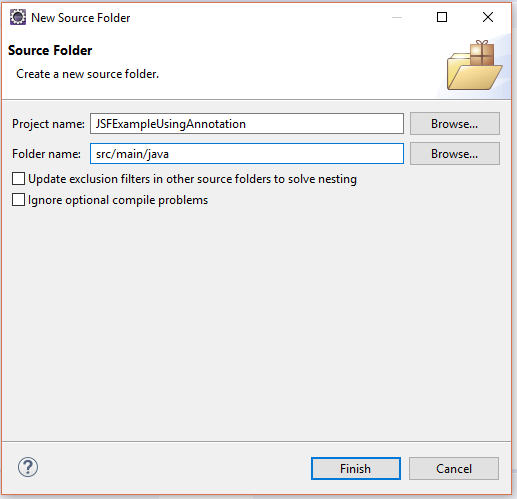
Create src/main/java source folder. Sometimes this folder will be filtered out from eclipse package explorer. If already this src/main/java source folder is available you will not be allowed to create it, but if already present and hidden you right click on project > New > Folder, it will make this src/main/java source folder visible. If this src/main/java source does not exists you should right click on project > New > Source Folder, it will create the folder as source folder.

Add dependencies in pom.xml
Add the below JSF API and Implementation dependencies in pom.xml file. After updating pom.xml, Press Alt+F12 to update the maven project in eclipse.
pom.xml
<project xmlns="https://maven.apache.org/POM/4.0.0" xmlns:xsi="https://www.w3.org/2001/XMLSchema-instance" xsi:schemaLocation="https://maven.apache.org/POM/4.0.0 https://maven.apache.org/maven-v4_0_0.xsd"> <modelVersion>4.0.0</modelVersion> <groupId>com.java4coding</groupId> <artifactId>JSFExampleUsingAnnotation</artifactId> <packaging>war</packaging> <version>1.0-SNAPSHOT</version> <name>JSFExampleUsingAnnotation Maven Webapp</name> <url>https://maven.apache.org</url> <dependencies> <dependency> <groupId>com.sun.faces</groupId> <artifactId>jsf-api</artifactId> <version>2.2.6</version> </dependency> <dependency> <groupId>com.sun.faces</groupId> <artifactId>jsf-impl</artifactId> <version>2.2.6</version> </dependency> </dependencies> <build> <finalName>JSFExampleUsingAnnotation</finalName> </build> </project> |
Create facelets
In this example we create 3 facelets login.xhtml, success.xhtml and failure.xhtml. In login.xhtml user is asked to input name and password. If name is “Manu_M” and password is “mm” then success.xhtml is given as response, otherwise failure.xhtml is given as response.
login.xhtml
<!DOCTYPE html PUBLIC "-//W3C//DTD XHTML 1.0 Transitional//EN" "https://www.w3.org/TR/xhtml1/DTD/xhtml1-transitional.dtd">
<html xmlns="https://www.w3.org/1999/xhtml" xmlns:h="https://xmlns.jcp.org/jsf/html" xmlns:f="https://xmlns.jcp.org/jsf/core">
<h:head></h:head> <h:body style="background-color:yellow"> <h:form> <h1>Please enter your details</h1> <h:panelGrid columns="2"> <h:outputText value="Enter your name"/> <h:inputText id="nme" value="#{helloBean.name}"/>
<h:outputText value="Enter your password"/> <h:inputSecret id ="pwd" value="#{helloBean.password}"/>
<h:commandButton value="LOGIN" action ="#{helloBean.checkUser}"/> </h:panelGrid> </h:form> </h:body> </html> |
success.xhtml
<!DOCTYPE html PUBLIC "-//W3C//DTD XHTML 1.0 Transitional//EN" "https://www.w3.org/TR/xhtml1/DTD/xhtml1-transitional.dtd">
<html xmlns="https://www.w3.org/1999/xhtml" xmlns:h="https://xmlns.jcp.org/jsf/html" xmlns:f="https://xmlns.jcp.org/jsf/core">
<h:head></h:head> <h:body style="background-color:green"> <h1> Hello Mr. <h:outputText value="#{helloBean.name}" /> you are welcome <br /> Thank You for logging in.... </h1> </h:body> </html> |
failure.xhtml
<!DOCTYPE html PUBLIC "-//W3C//DTD XHTML 1.0 Transitional//EN" "https://www.w3.org/TR/xhtml1/DTD/xhtml1-transitional.dtd">
<html xmlns="https://www.w3.org/1999/xhtml" xmlns:h="https://xmlns.jcp.org/jsf/html" xmlns:f="https://xmlns.jcp.org/jsf/core">
<h:head></h:head> <h:body style="background-color:red"> <h1> Hello Mr. <h:outputText value="#{helloBean.name}" /> you are not welcome <br /> You are invalid user </h1> </h:body>
</html> |
Create ManagedBean
Create the managed bean class and annotate it with @ManagedBean Annotation. We have used @RequestScoped annotation to define the scope of the bean.
HelloBean.java
package com.java4coding;
import javax.annotation.PostConstruct; import javax.annotation.PreDestroy; import javax.faces.bean.ManagedBean; import javax.faces.bean.RequestScoped;
@ManagedBean @RequestScoped public class HelloBean {
private String name; private String password;
static { System.out.println("Inside HelloBean static block ++++++"); }
{ System.out.println("Inside HelloBean instance block ++++++"); }
public HelloBean() { System.out.println("Inside HelloBean constructor ++++++"); }
@PostConstruct public void myInit() { System.out.println("Inside HelloBean @PostConstruct method ++++++"); }
@PreDestroy public void myClear() { System.out.println("Inside HelloBean @PreDestroy method ++++++"); }
public String checkUser() { String str = null; if (name.equalsIgnoreCase("Manu_M") && password.equalsIgnoreCase("mm")) { str = "success"; return str; } else { str = "failure"; return str; } }
public String getName() { return name; }
public void setName(String name) { this.name = name; }
public String getPassword() { return password; }
public void setPassword(String password) { this.password = password; }
}
|
Add FacesServlet entry in web.xml file
<!DOCTYPE web-app PUBLIC "-//Sun Microsystems, Inc.//DTD Web Application 2.3//EN" "https://java.sun.com/dtd/web-app_2_3.dtd" >
<web-app> <display-name>Archetype Created Web Application</display-name> <servlet> <servlet-name>Faces Servlet</servlet-name> <servlet-class>javax.faces.webapp.FacesServlet</servlet-class> <load-on-startup>1</load-on-startup> </servlet> <servlet-mapping> <servlet-name>Faces Servlet</servlet-name> <url-pattern>*.xhtml</url-pattern> </servlet-mapping> </web-app> |
When web.xml is generated automatically by eclipse, url pattern will be as below
<url-pattern>/faces/*</url-pattern>
This also works fine, but change the url pattern to as below
<url-pattern> *.xhtml</url-pattern>
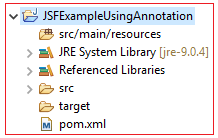
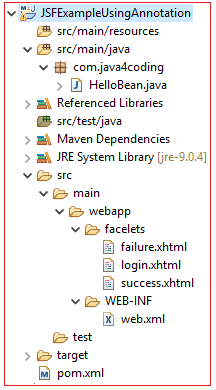
Eclipse final project directory structure
Output
(For initial-non postback request)
Browser output | Server Console output |
Inside HelloBean static block ++++++ |
(For Postback request)
Browser output | Server Console output |
Inside HelloBean instance block ++++++ Inside HelloBean constructor ++++++ Inside HelloBean @PostConstruct method ++++++ Inside HelloBean @PreDestroy method ++++++
Above output is obtained when user presses login button. For each time user presses login button above statements are printed.
For example user has pressed login button two times either refreshing the page or by navigating back to home page, then output will be
Inside HelloBean instance block ++++++ Inside HelloBean constructor ++++++ Inside HelloBean @PostConstruct method ++++++ Inside HelloBean @PreDestroy method ++++++ Inside HelloBean instance block ++++++ Inside HelloBean constructor ++++++ Inside HelloBean @PostConstruct method ++++++ Inside HelloBean @PreDestroy method ++++++ |
All Chapters
