
| ☰ See All Chapters |
MySQL Workbench
To learn SQL a database is required. We have learnt to install MySql database in previous chapter. Please install MySql DB if it is not installed.
When we install MySql, MySql Workbench product will also be installed. We will use this MySql workbench as an editor for SQL. If you do not have the MySql workbench you can work on MySql terminal.
Follow the below steps to work on MySql workbench
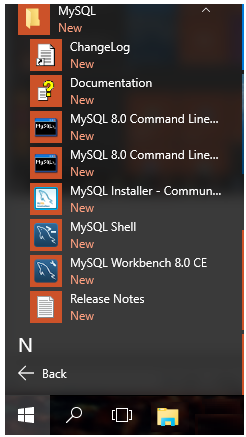
1. Select Window start button> All programs> MySQL> MySQL workbench
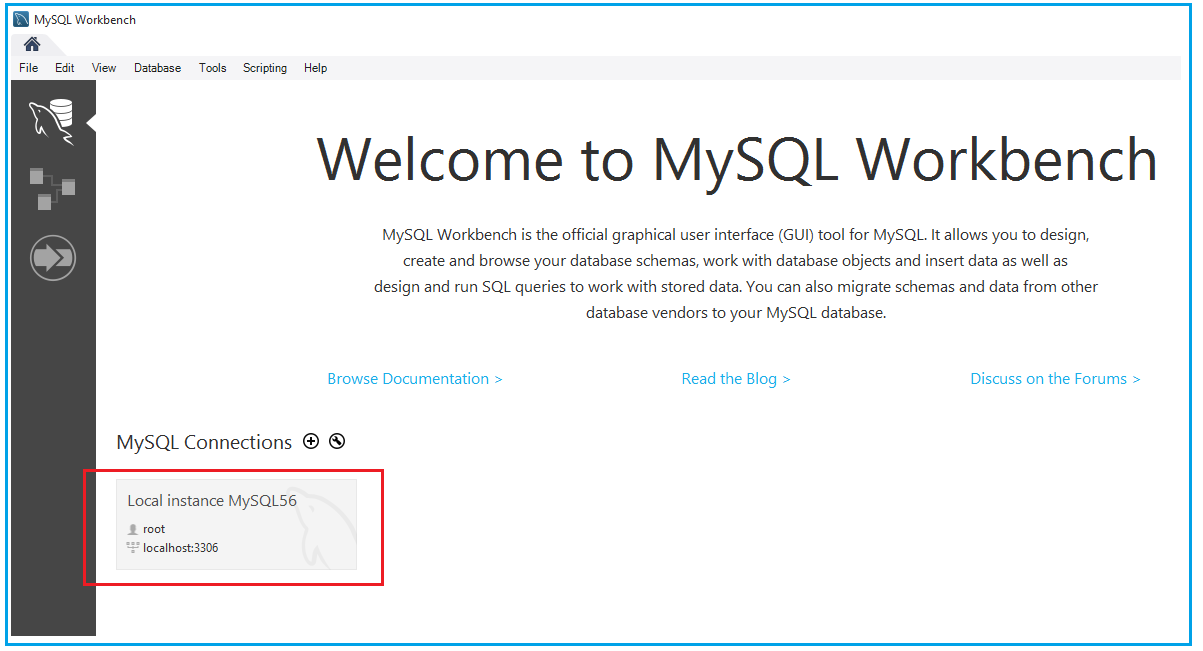
2. Click on Local instance MySQL
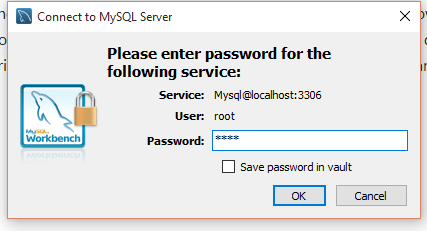
3. Enter password and then click OK
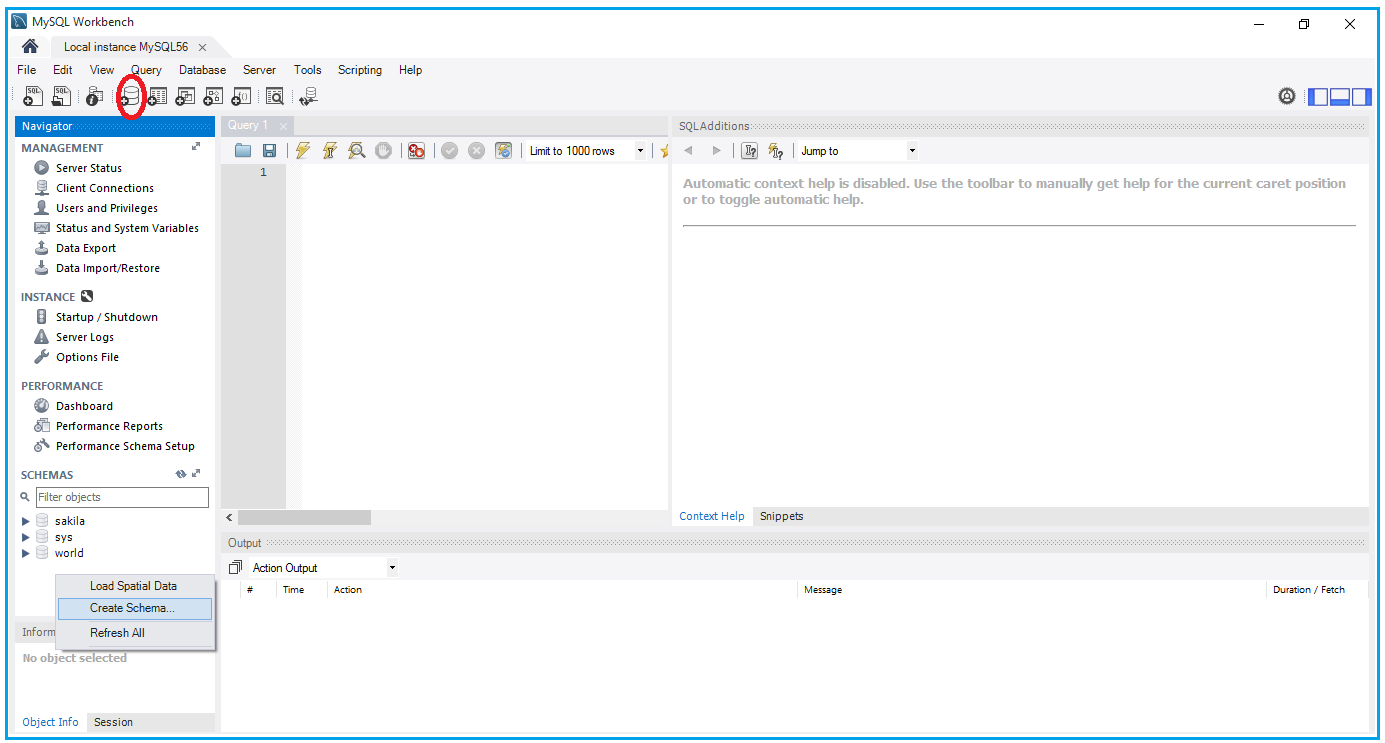
4. Create schema, by default some schemas are created, below those right click and select Create Schema option or click on create schema button.
5. Enter the schema name as “study” then click on Apply.
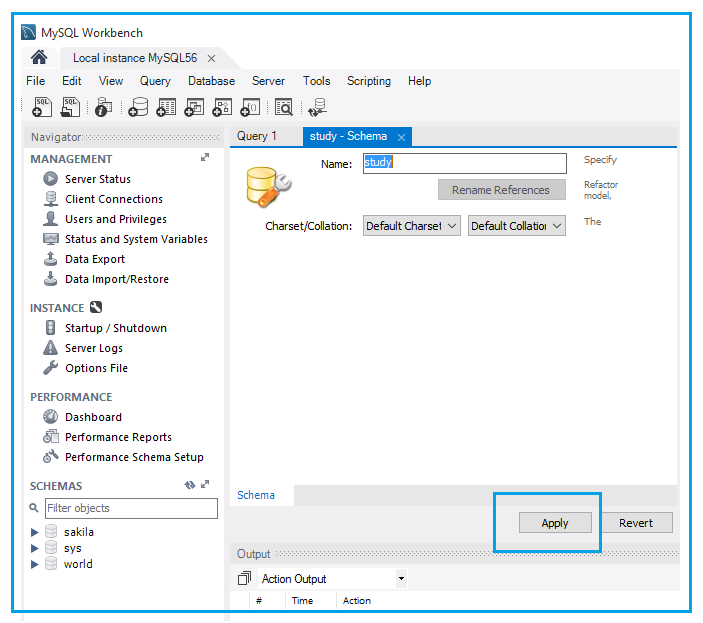
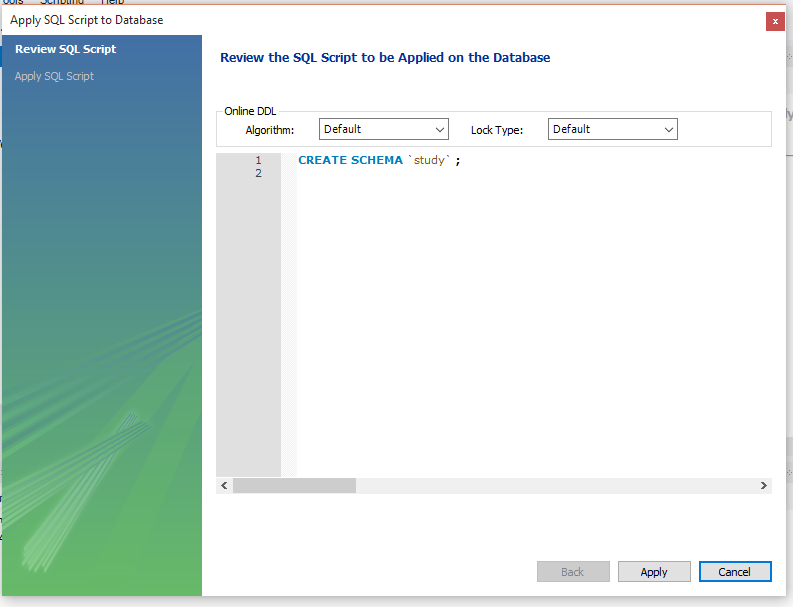
6. Click on Apply.
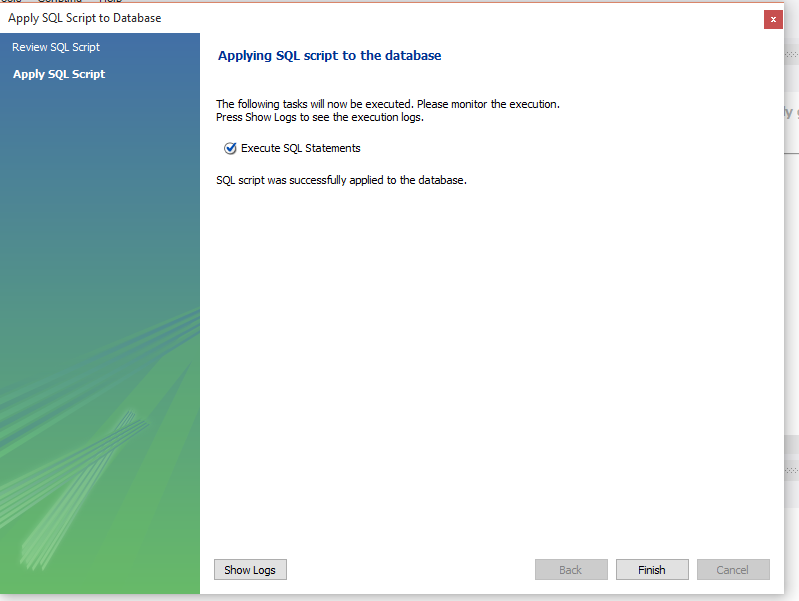
7. Click on Finish
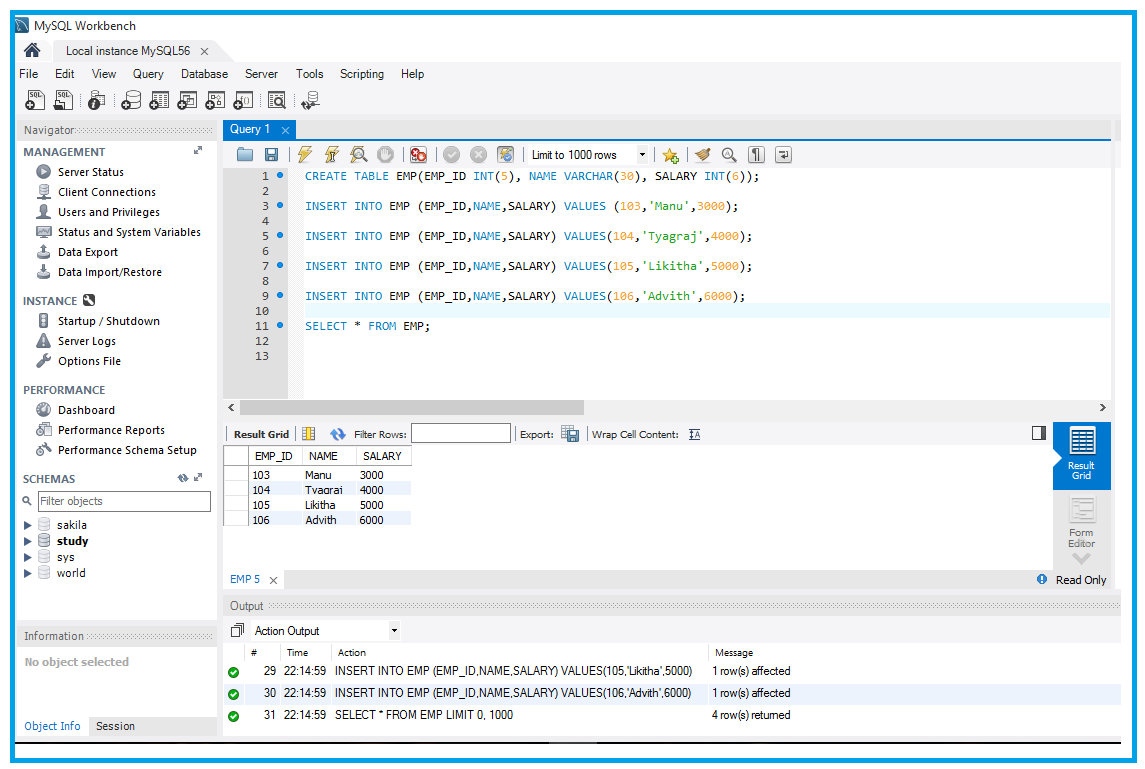
8. Enter the below sql script and click on execute button.
CREATE TABLE EMP(EMP_ID INT(5), NAME VARCHAR(30), SALARY INT(6));
INSERT INTO EMP (EMP_ID,NAME,SALARY) VALUES (103,'Manu',3000);
INSERT INTO EMP (EMP_ID,NAME,SALARY) VALUES(104,'Tyagraj',4000);
INSERT INTO EMP (EMP_ID,NAME,SALARY) VALUES(105,'Likitha',5000);
INSERT INTO EMP (EMP_ID,NAME,SALARY) VALUES(106,'Advith',6000);
SELECT * FROM EMP;
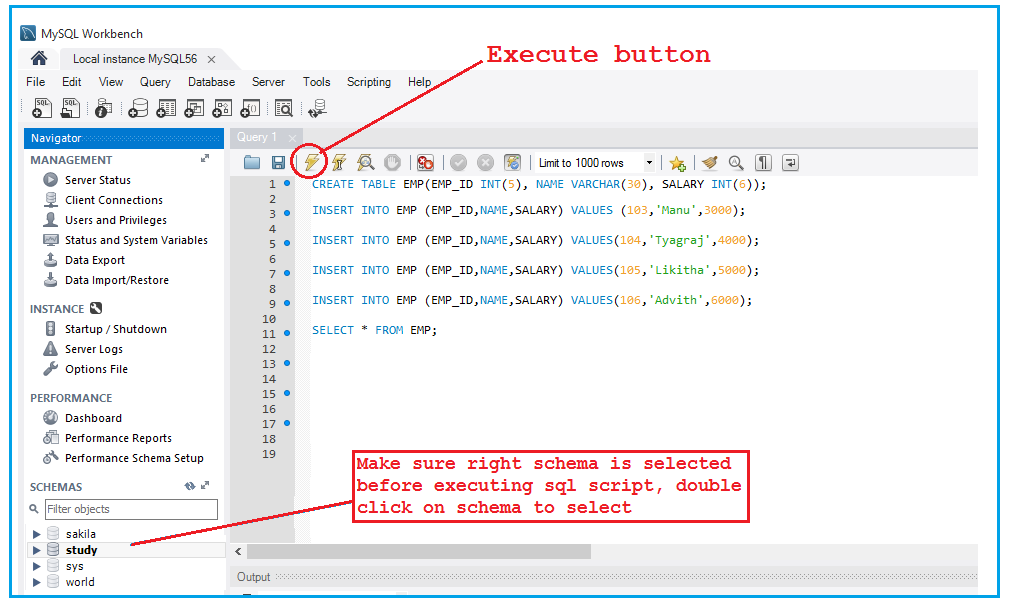
After executing the sql script, we can see the created table
All Chapters
